Homebrew Husband Hacks
Is It Cookware, Or Is It A Blunt Object? Re-Seasoning Cast Iron
 .
.  for $5 at a thrift store when I was a college kid. At the time it was patinaed orange with rust and neglect. I’m pretty one of the big-guns
 was handed down from my Grandma (aren’t all cast iron skillets handed down from someone’s Grandma?). The baby of the set
 I bought new because I needed something small to cook eggs in for my daughter’s breakfasts, but at $13 it’s not like it was a break the bank
 i
i nvestment.
Palm Your Tater: Exfoliating Gloves Clean Root Vegetables
A while back I realized that the cheap scrubbing-mitts I kept in the shower might do for root veggies what they do for my post-garden-work-Hobbit feet: get the dirt off.
I bought a pair for kitchen use and put them to work.
Here’s how they fared against purple potatoes and sunchokes fresh out of the ground and in need of a scrubbing.
Before:
Big win. This is a fast, efficient way to deal with cleaning root veggies. Both hands are doing the scrubbing, so any relatively smooth tuber or root just needs to be swiped around between your palms to be cleaned, and it’s easy to judge when to scrub more or less firmly.
I like that I can toss these mitts into the wash with my kitchen towels and a little bleach and sanitize them. I also like that I don’t get “scrub brush gripping claw hand” when I’m tackling a large pile of potatoes or parsnips in need of cleaning. Weird folds or divots may still need long bristles to get fully clean, or you can just cut those parts of the veggie out.
These exfoliating gloves can usually be found in dollar stores, drug stores, etc. for a buck or two – way less than an actual vegetable scrub brush.
The only downside is the (ahem) suggestive motion that occurs when one is scrubbing a carrot or parsnip. If one were to share kitchen space with a particularly gutter-minded spouse, partner or roommate, certain comments might have to be endured in pursuit of a clean carrot.
The Essential Apple Peeler Gizmo
This is my apple peeler gadget:
I don’t know if this thing has a proper name. It seems like something you’d find in the back of a barn somewhere to crank start machinery that no one uses anymore. And in truth it probably was invented 160 years ago and hasn’t changed since. But don’t let the lack of a shiny plastic case or bluetooth capability fool you: this tool is a great little timesaver for the modern homestead when it comes time to deal with apples.
Here’s how it works:
And you’d like to turn it into this:
Then you might want to consider picking up your own apple peeler thingy.
A few notes: while I love my peeler gadget, it is not an example of the most robust construction I’ve ever seen. When I was doing pounds and pounds of apples, I got in the habit of keeping a small screwdriver at my workspace because it needed periodic adjustments and tightenings.
You’ll also notice I use my thumb in the video to hold the base of the slicer blade in place until it has firmly “bitten” into the apple. I found this really helped stop the blade from slipping out of alignment when it met the apple. After a few pounds, you learn how to most efficiently line up the apple and work the peeler to get the most consistent results.
Even with a few adjustments, it was so much faster than hand peeling and slicing. This tool helped me power through 80 pounds of apples without losing my mind. It’s an oldie but a goodie.
The Finnish Potato Masher I Can’t Live Without
A fellow personal chef friend of mine who is married to a Finnish man gave me this…uh…suggestive kitchen tool a few years back.
I’ll be honest, I wasn’t entirely certain what it was (Scandinavian modern sculpture? World’s biggest muddler? Minimalist bishop from an oversize chess set?) or what to do with it, though several inappropriate things naturally sprung to mind.
When my friend told me this was a traditional Finnish wooden potato masher I pretended that, of course, that was what I assumed all along. Only a pervert would assume it was something else, think of internal splinters, and clench their thighs in horor. And I am definitely not a pervert.
So I went home and displayed my wooden potato masher in my kitchen. Why I didn’t use it as a potato masher, I can’t say, except that I’ve always been a food mill girl.
But lately, I’ve been taking the Finnish Potato Masher down off the shelf and I’m finding it surprisingly indispensable. But not for potatoes. And, no, not for that either! Geez, who’s the pervert now, huh?
I’ve discovered it’s perfect for:
- Pounding cabbage when making sauerkraut.
- Crushing eggshells up to use as a calcium supplement to feed back to the chickens.
And I’m thinking it’s got potential for:
- smashing garlic cloves
- tamping down drop cookies
- muddling citrus
- tenderizing or flattening meat into cutlets
- bruising herbs for a marinade or sauce
- pressing berries and soft fruit through a strainer
- cracking spices as a lightweight pestle
In fact the more I think about it, the more shocked I am that I’ve lived my whole life without this multi-purpose device.
I may even try mashing potatoes with it one day.
Anyone else have a potato masher like this? What do you use yours for?
A Tour Of The Indoor Seed Starting Rack
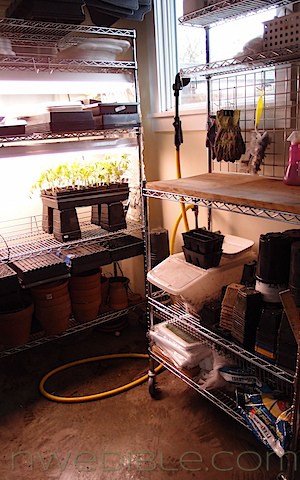
My seed-starting set-up is pretty well equipped, which makes it a lot easier to manage the fairly aggressive seed-starting schedule I keep.
When we moved into our current home, I commandeered a corner of the garage as my indoor garden and seed-starting area. Having a dedicated area to grow out seedlings is a luxury, but one I would sacrifice quite a few other luxuries to maintain.
Seed Starting Rack
The rack that holds my seed lights is a standard industrial post-and wire chrome shelving rack. I swear by these racks, and we have them wall-to-wall in the garage. I bought this one at Costco for about $70. It’s 48″ wide, which makes it the perfect width for hanging 4-foot shop lights.
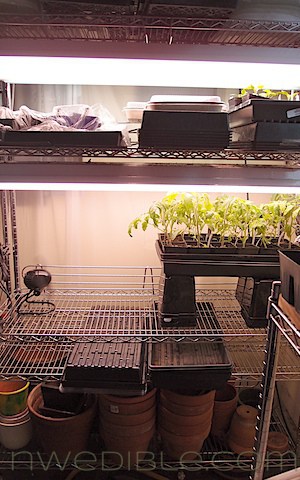
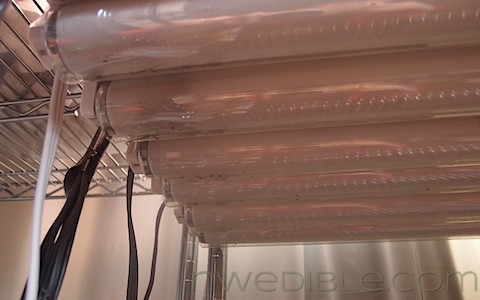
The rack has two layers of industrial shop lights fixtures (cheap) fitted with full-spectrum florescent light tubes (not cheap, but very long lasting).
Each shelf of lights is three-fixtures (or six tube lights) deep and holds two standard seed trays placed lengthwise with plenty of room and light, or 4 seed trays placed widthwise with some crowding and less light than is ideal towards the edges of the seed trays.The light fixtures come with a chain, and this chain is simply hung from the wire shelf above the lights.
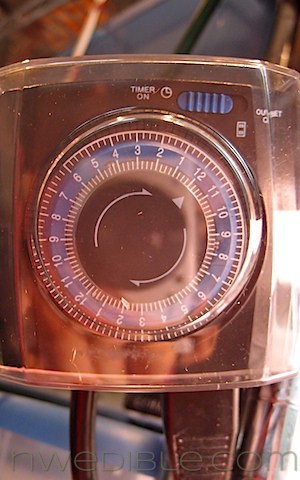
The lights are on automatic timers, but can be unplugged separately so I can run only one bank of lights at a time when seed-starting is just ramping up.
The lights are not conveniently adjustable, so I have a low-height light shelf and a high-height light shelf and I place risers (empty pots, seed trays, etc.) under and seeds I need to lift closer to the lights.

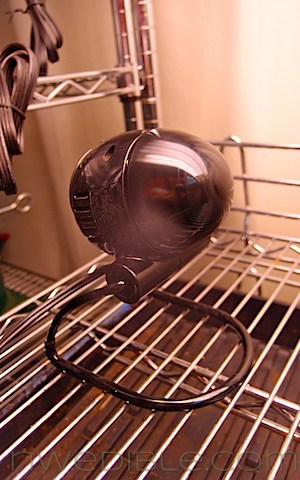
I believe strongly in keeping air-flow over and around my seedlings, and I have a small soft-bladed fan that I keep on constantly.
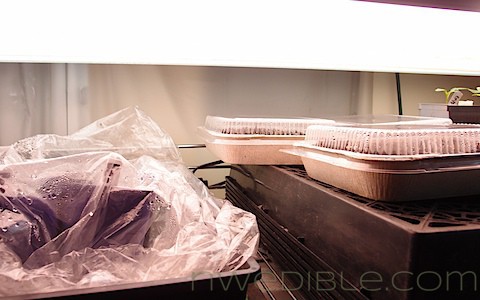
When I have seeds I am germinating, I cover their pots or trays with clear plastic bags (the ones from the dry cleaner are great) or propagation domes. The little trays with matching propagation domes on the right were originally take out containers from a local Mexican restaurant. The size and depth is perfect for geminating lettuce seeds. You gotta love repurposing like that.
I have two seedling heat mats. I use them to get tomatoes, peppers, squash and other heat lovers up and going. After strong germination I tend to move my seedlings off the mat because I prefer they grow harder, even if it means growing slower. The last thing I want to raise is a pepper that thinks it should expect 78-degree soil all the time!
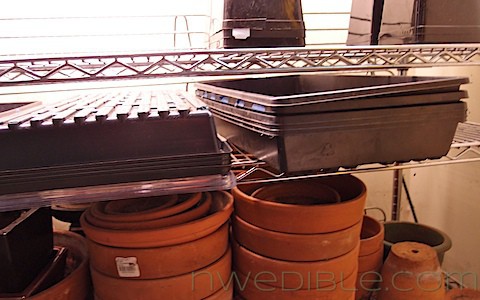
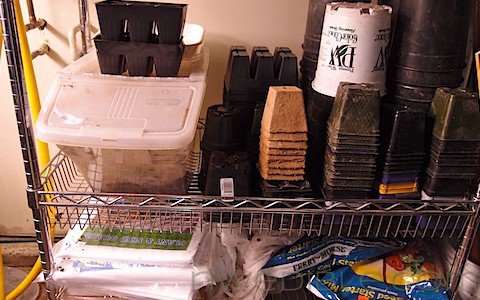
Under the seed-starting area, I have a few shelves that hold extra seed trays and the collection of cheap terracotta pots I never use but can’t bring myself to part with.
Potting Bench
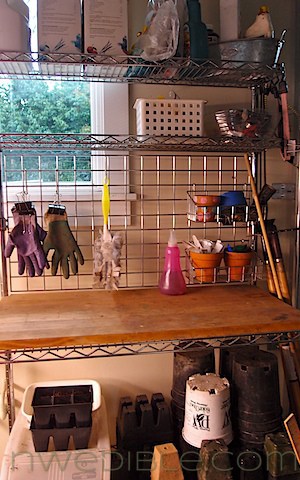
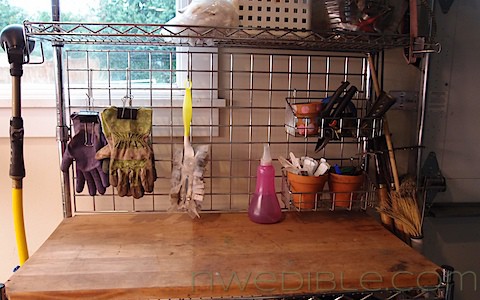
Cater-corner to the seed starting rack is my potting bench. We bought this post-and-wire rack from an organization store when we lived in our old home, and then it was the best kitchen storage we had. When we moved to our current home there wasn’t a place for it, until it I had a Potting Bench Ah-Hah! moment.
I use mini terracotta pots to contain seed labels, sharpies, small scissors for thinning seedlings and other random flotsam of gardening. Can I mention how much I love huge binder clips? I use them everywhere: to hold gloves together, to keep plastic low-tunnels secured to pvc-hoops in the garden, to hold string to trellises when I’m one-handed with a baby-on-my-hip and can’t reliably knot something, and so on. Since the potting bench gets dirty every time I use it, I added a little mini-duster-thing to the collection of tools I keep on hand. This makes it much easier to sweep spilled potting mix back into the potting mix bin.
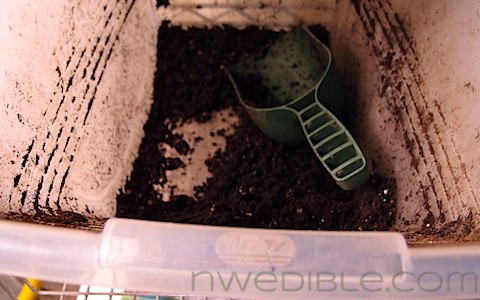
Under the bench area is a big shelf with my potting mix tub and all my commonly used pots stacked up. Beneath that I store Reemay and whatever random bags of seed mix, bone meal or whatever needs a place to live.
The potting mix tub gets refilled as needed. Right now, it needs it.
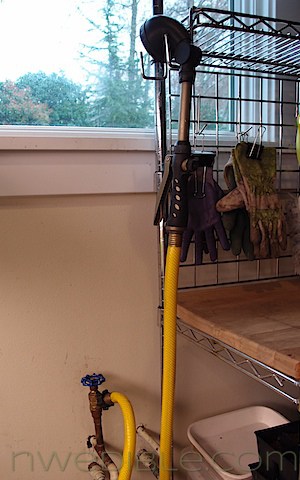
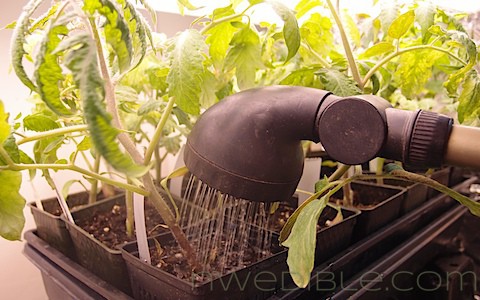
The best $50 I ever spent was paying a plumber to tap a hose bib into the wall between my seed starting rack and my potting bench. I keep a short hose fitted with a gentle spray head attached to the hose bib and hang it from my potting bench.
Watering seedlings is as simple as turning on the hose bib and either filling the seed-tray for bottom-watering (my preferred method) or pulling seedlings off the rack and giving them a gentle sprinkle. Since the floor of the garage is concrete and the excess water runs out the garage door, I don’t worry about overspray or dripping.
Speaking of dripping, I’ve had a lot of people ask if having the plants on the upper level drip into the lights directly below them is a problem. All I can say is, I am not particularly careful, water does drip, and it has never been a problem for me.
I love my little seed starting corner of the garage. Do you have a dedicated place to raise seedlings and perform your indoor gardening tasks? If you have a photo of your set-up, leave a link in the comments so we can all see how different gardeners organize their growing space.
Don’t Buy These 5 Williams-Sonoma Agrarian Products
Last week Williams-Sonoma branched out from French dishwear, excellent knives and seasonal high-end cocoa mix into urban homesteading gear. With the launch of their Agrarian line, Williams-Sonoma now sells gardening gear, chicken and bee keeping supplies, seeds, edible plants, fruit trees and preserving supplies.
Some people in the hardcore DIY community (you know who you are) may have scoffed a bit at the idea of Williams-Sonoma, a genteel and polished mega-mall staple store, serving a market populated by of a bunch of anti-consumerist dirt-lovin’ neo-hippies. Dirty hippies get so confounded when everything they are doing is suddenly the height of suburban trendiness. (I mean dirty hippie with the greatest respect and affection, of course.)
A fair amount of my bakeware, a Le Creuset pot and some of my knife collection came from an employee-discounted-stint as a holiday seasonal worker at my local Williams-Sonoma, and I have nothing at all against the store. So when the Agrarian line launched, I took a long virtual look at the Agrarian Collection, and – all pseudo-dirty hippie DIY-girl pride aside – I would totally buy some of this stuff.
These Weck jars, for example: Gorgeous! I’m picturing very elegant spaghetti sauce.
But there are a few things in the Agrarian line that just pluck my cynic strings too hard. After an exhaustive search of the Agrarian product line (I’ll do any amount of “research” for my readers!), I present the five Agrarian products you shouldn’t buy from Williams-Sonoma.
Williams-Sonoma is not the right place to buy:
1. Organic Heirloom Sugar Snap Pea – $16.95
For now, let’s ignore the roughly gaillion percent mark-up that turns two or three pea seeds, a cup of potting mix and some burlap into a $17 item.
Let’s focus on how you want to grow your own food because local is better, right?
“To ensure freshness, perishable items are shipped overnight from the supplier and are not eligible for rush shipping.”
- Williams-Sonoma shipping for live plants, including our $17 pea shoot.
So let’s talk about the sustainability of shipping a single pea tendril in a little burlap-wrapped plastic pot overnight for $17. First, overnight shipping almost certainly means by airplane, using the now-standard and uber-efficient hub-and-spoke system employed by UPS, FedEx and pretty much anyone else in the overnight delivery business.
So let’s say this pea seedling is grown in central California (what isn’t?) and is shipped FedEx overnight. (These are mental-exercise guesses, but to be fair I know neither which carrier ships for Williams-Sonoma nor the location of the supplier nursery.)
I want to grow peas, so I order this product for delivery to my home in the Seattle area.
My pea shoot gets on a truck which takes it to a plane flying out of Sacramento. It takes a trip to the FedEx Hub of Memphis (1760 miles of flight distance). It has a brief little layover in the Pea Shoot Waiting Lounge and embarks on a second flight back to Seattle (1837 miles of flight distance). Nice people unpack it and put it on a truck for delivery to me.
Let’s ignore the truck transport on either end, I don’t want to be gratuitous while making this point. Total flown miles: 3597. Long flights release an estimated 0.39 pounds of CO2 per mile, which means the flights carrying my single little pea tendril emit about 1400 pounds of CO2.
Wow, that’s kind of a big carbon footprint to eat sustainably from your backyard, isn’t it?
Real Gardener Assessment: Really local really is better. Seeds and locally grown starts from nurseries in your area are about $3, will be better adapted to your climate and more likely to be offered at the right time for planting. Plus you won’t need to purchase carbon (or irony) offsets. If the burlap is important, my local nursery sells recycled coffee bags at 5 for $5. That ought to keep you in burlap-wrapped pots forever.
2. Copper Long-Handle Spade - $199.95 and
3. Copper Long-Handle Fork - $299.95
Reviewed together because I have the same thing to say about them.
These items are featured in the Williams-Sonoma Top 10 Agrarian Gift List, so presumably the Williams-Sonoma marketing department sees them as winners. I see them as ridiculous. Together these tools cost $500. The only possible reason to buy these bujeezus expensive pieces of garden art is if you will, in fact, be using them as art.
If the plan is to outfit the doors to your gentleman hobby farm’s equestrian center with the spade and fork as door handles, break out the AmEx and go to town. That would be stunning. Take a picture, it’ll get repined all over the interwebs.
If you actually need to, you know, garden, by digging and forking in the soil, stay away from tools made from one of the softest metals around.
You know those late night infomercials where the knife cuts through the penny? And you know those machines at the zoo that take a penny plus a few quarters and press the penny into a fun keepsake embossed with a lemur? That’s should give you an idea how soft copper is.
Sticklers will point out that a modern penny is actually mostly zinc. Zinc has a Young’s modulus – the measurement of how much a metal resists deforming – of 108 GPa; copper is quite close at 117 GPa. For comparison, steel, the material most good $30 shovels are made of, is nearly 80% harder at 210 GPa.
Williams-Sonoma points out these tools are sharpened to “slice through hardened earth.” That’s great, but soft metals don’t hold their edge, so even if the spade is razor sharp out of the box, a few hours of hard use will have dulled it considerably. This is why you never see knives made out of copper.
Real Gardener Assessment: They are gorgeous, but if you buy these for anything other than display you deserve to get whacked upside the head with them.
4. Chicken Coop Predator Kit – $59.95

"Yeah, my twin brother is kind of the black sheep of the family. He lives at Home Depot. We don't really talk much."
When Homebrew Husband and I got married, I used to joke that the fastest way to double the price of something was to add the word “wedding” to it. Now I realize the same is true for the phrase “Urban Chicken”
Those of you with chickens will recognize this product as good ol’ hardware cloth. One-half inch mesh galvanized hardware cloth was the single most expensive component of both my chicken coops, and likely of yours too.
Want a way to make an expensive building material even more expensive? Throw in about $3 worth of nails and washers and call it a “Predator Kit.”
Williams-Sonoma sells a 2’ wide x 25’ roll of hardware cloth for $60. That’s $1.20 a square foot. The going price on-line for a 2’ wide x 50′ roll (Twice as much!) is about $40.69, or 41 cents per square foot.
Now I am not one to judge when it comes to throwing money at a coop. (I threw deep at mine.) But it seems to me that paying three times the effective per-unit cost for an identical product so you can use the Williams-Sonoma online checkout instead of the Amazon online checkout is about as silly as it gets.
Real Chicken Keeper Assessment: Keeping your girls safe is noble and important. So is keeping them fed. Buy the galvanized hardware cloth elsewhere and save some money for layer feed.
5. Cedar Raised Bed Kit – 4′ x 4′ x 10” deep – $179.95
This raised bed looks gorgeous. It has nice detailing on the ends, which interleave attractively and the hardware looks sturdy. It’s made of solid 2×10” cedar, which is premium wood.
It’s just that building a raised bed is so simple, I can’t imagine justifying spending $180 on 16 square feet of grow space.
To DIY this bed, you’d need 2, 8-foot long pieces of 2×10 cedar and the appropriate hardware.
The going rate for that cut of lumber is $35.16, so 2 boards will cost about $70 (none too cheap, compared to the dimension lumber we build our beds out of, but long-lasting). Your local lumberyard will probably even cut the 8-foot lengths in half for you, making your assembly job at home as easy as it gets.
It looks like these beds are fastened with hex-head lag screws. A pack of 25 in a nice hefty size runs about $12. Each bed, based on the Williams-Sonoma bed design, would require 16 lag screws.
So, materials cost to build a totally equivalent bed is $82. You save about $100 if you’re willing to put an hour of your time running to the hardware store and screwing some pieces of wood together.
For $20 my local hardware store will deliver the materials to you – if your time really is money – and you’d still be $80 ahead on this project. Remember, you’d have to assemble the Williams-Sonoma beds, too.
Real Gardener Assessment: Gorgeous, high-quality beds. If I won the lottery and put in a demo garden featuring petite-scale inspiration gardens (“Look at what you can grow in just a 4 by 4-foot area!”) I might look at these. When cost is a factor, even a little bit, the $100 you save building your own primo cedar raised beds is money you can spend on good quality garden soil, organic fertilizer, a soaker hose and some seeds.
all images: Williams-Sonoma
Buying An All American 30 Quart Pressure Canner: The Good, The Bad and The Ugly
If you are part of the NW Edible community on Facebook, then you may already know about the pressure canner that brought me to tears.
I had some birthday money, you see. Visions of pantry-ready, home-canned stock danced in my head.
And so, after some research, I look the plunge into pressure canners. It was a big, $300 plunge but it bought me what I was sure was the last pressure canner I’d ever need – the kind of homemaker tool I could pass down to my kids or grandkids.
I purchased the All-American 30 Quart Canner. It holds a ton, gets fantastic reviews on Amazon and is widely regarded as well worth the hefty price tag. It has a metal-on-metal seal (no gasket to wear out) and is even made in America.
What could possibly go wrong?
I was so excited to receive my canner. I bought it through Amazon and two days after clicking “buy it now!” I was unboxing the beast in my living room.
“It’s here!” I squealed to my son, who, in the manner of toddlers everywhere, was super excited to have something to be super excited about.
The Ugly
Everything looked wrong.
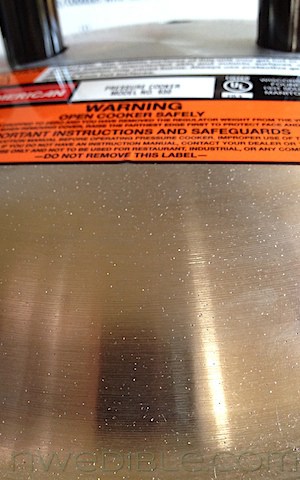
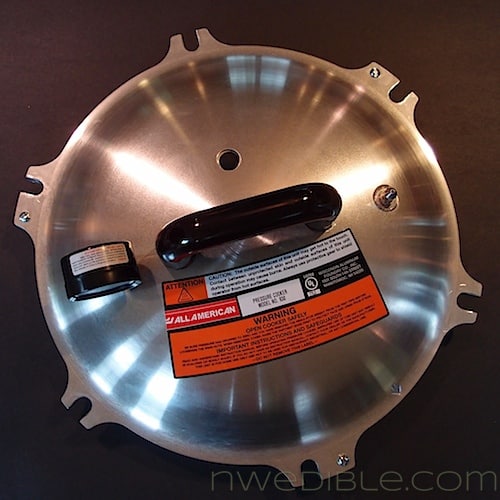
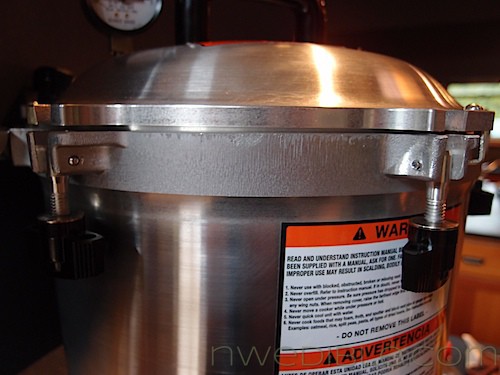
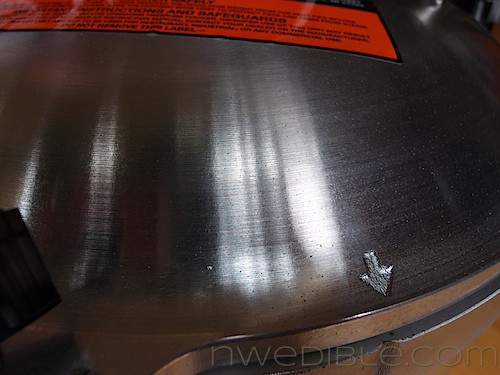
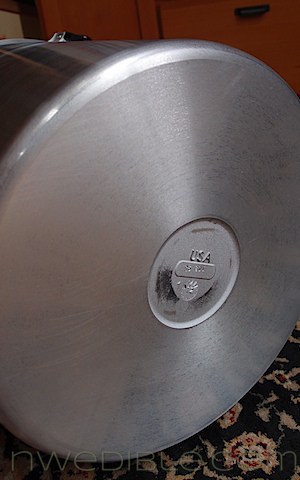
The lid of the canner was totally covered with very noticeable pit marks.
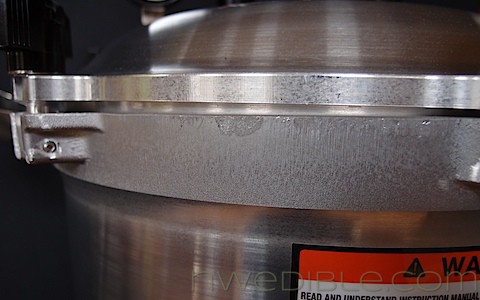
The lip of the canner was scratched and rough.
The base had a deep gouge, like some angry giant had stuck his thumbnail right into the base of the metal before it cooled.
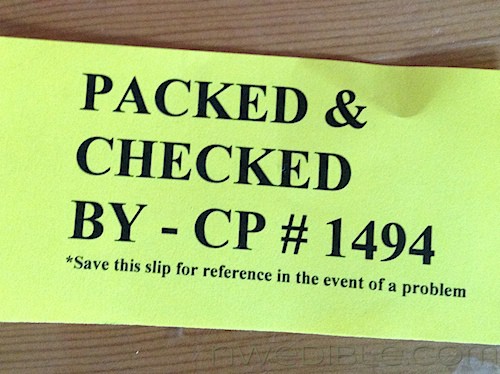
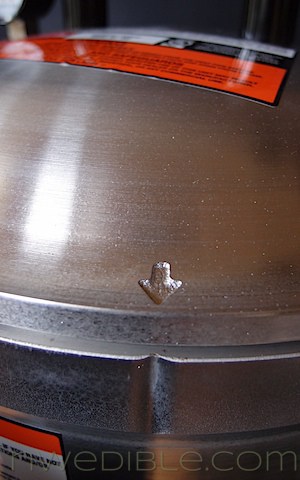
Inside the canner was a little sign, giving the inspection number of the All-American employee who gave this canner the a-ok for packing and selling-on.
The Bad
The disappointment I felt was crushing. That sounds really stupid, I know, and melodramatic, because a pressure canner is just a thing. This isn’t in the category of Big Deals like illness or job loss.
But as minor deals go, this one stung. That canner was $300, and one of the few splurges outside of compost and seeds that I’d bought for myself in a fair long while. And so I looked at my ugly, flawed canner and all my disappointment hit me and I cried a teeny bit.
Eventually I picked myself up and called All-American, the manufacturer of the canner.
A woman answered the phone. I explained that there were pit marks in the lid of my canner and I wanted to know if that was normal. She told me there probably weren’t any pit marks, it was just how the canners were made.
Since I generally put more trust my own evaluation of something when I’m staring right at it over the assurances of someone half-a-country away, I re-explained that there were pitmarks all over the lid of the canner.
She told me someone named John would call me back the next day.
All-American was not winning any customer service awards at this point. But, to the company’s credit, John – the Plant Supervisor, as it turns out – called me back just a few minutes later.
The Explanation
We talked extensively about the pitmarks and John explained that, because of the process they use to fill the mold completely with aluminum, many of the canners will have small “bubbles” at the surface. He assured me these did not affect the function of the canner.
We talked about the swath of scratches and divots along the lip of the canner and John explained that those were markings from the unmolding process.
I learned that these canners are very expensive for All-American to manufacture, and that as a cost saving measure, and to remain competitive against canners made in China and South America, All-American made the decision at some point to stop polishing out surface imperfections in their canners. John said that if they were still doing that degree of polishing it would add at least another $60 to the cost of the canner I had purchased. At the discounted Amazon rate I paid, this would have been an increase of about 20%.
It was clear when I was talking with John that he was a guy who cared about his product, but that he was also deeply invested in the financial realities of his company.
In other words, I would be offered patient explanations, but not an expensive replacement pressure canner. The cosmetic issues with the canner as I described them were considered within the range of normal.
Finally I asked about the gouge on the bottom of the canner. At this, I believe John recognized that the degree of damage to this pressure canner was above and beyond what a $300 new-in-box product should arrive with. He told me that if I wanted, All-American would replace the base (but not the lid with the pit-marks) of the canner.
John reassured me that the base, even with the gouge, was safe to operate, but told me that if I chose to exchange it, All-American would send me a new base.
Our conversation was very cordial and I told him I’d like to sit with my flawed canner and think about my options, but I would let him know how I wanted to proceed.
The Good: Amazon.com’s Amazing Customer Service
Within an hour I made the decision that I could not live with the pressure canner I had received. Even if it was safe to operate in the condition in which it arrived, I couldn’t spend $300 on something that would fill me with disappointment and resentment every time I used it. But I wasn’t totally willing to give up on this canner, which gets such amazing reviews from just about everyone. I jumped on-line and initiated a one-for-one exchange through Amazon.com.
The entire exchange process on Amazon took about 30 seconds. I briefly described the damage to the canner and the website informed me that Amazon would ship another one out to me to arrive within two days.
As for returning the original canner, I didn’t even have to print out a return shipping label. All they asked was that I box the canner back up and have it ready for the shipper who would come to pick it up the next day.
Nothing in the entire process – return shipping, exchange, anything – cost me a penny or required that I leave my house.
Amazon, taking a bath on what I can only imagine was a substantial shipping charge, upgraded delivery on my replacement canner to overnight. I had my new All-American 30 Quart Pressure Canner in my hands less than 24 hour later. More on the replacement canner in a minute.
All-American’s Response
After initiating the exchange with Amazon I emailed John, explaining my decision to exchange the canner outright and encouraging All-American to heed the details, even the merely aesthetic ones, in order to maintain their excellent reputation. I included the same photos that appear above so All-American would have an accurate idea of what my canner looked like, and the degree of the blemishes I was describing.
I sent that email Thursday evening, and when I did not hear back from John by Monday afternoon I followed up, apprising him that I would be writing about my experience purchasing this pressure cooker on my website and asking if he cared to respond to my original email before I published my post. This was the first time I mentioned that I was a blogger.
(Note to any company with customers: assume every customer you deal with is a blogger or could become one within an hour. Because they could – it’s a low barrier-to-entry gig.)
I received an email back from John on Tuesday morning. He acknowledged that the canner I received was more pitted than the norm and apologized for not getting back to me sooner and for any inconvenience. He said that he was surprised by the gouge on the bottom and had talked to the assembly line about the situation.
You can read the full text of these emails below.
Assessing The Second Canner
I’m pleased to conclude that Ugly Canner appears to be somewhat of an outlier. My replacement canner was much prettier than my original canner, and numerous people on the Facebook page told me their All-American Pressure Canners arrived in great shape. From this, I conclude that the odds of getting an All-American Pressure Canner quite as ugly as the one I got are small.
However, if you buy one of these canners, expect surface imperfections. The shiny, brushed-metal perfection of the advertising photos on Amazon and elsewhere do not accurately depict the texture, mold marks and variations that occur on of the surface of the All-American Canner.
For example, if I look closely at Canner #2, there are a number of shallow pit marks on the lid, and there are a few small rough patches and markings on the lip. If I had received this canner first, I would probably never have thought about those flaws because I wouldn’t have looked for them.
After the disappointment of Ugly Canner, my eye is pretty well honed. I suspect, but do not know, that most All-American canners will show some evidence of surface pitting or mold marks.
With that disclaimer, I can contentedly live with my replacement All-American canner. Though not pristine, the second canner is in much better condition than the first. The markings are more discrete and the function seems excellent.
Would I recommend the All-American Pressure Canner?
Tentatively and reservedly, yes. But I would strongly encourage anyone buying something this expensive and with such potential variability to either pick out their individual canner in person, at a brick-and-mortar shop, or buy online at a place like Amazon where you are likely to get excellent customer service and simple, non-penal exchange policies if, like me, you receive a lemon the first time around.
As I write this, fish stock is cooling on the counter, the first trial of the pressure canner. It appears to have been a successful experiment, and using the canner for the first time was a small thrill. (“What if we do something wrong? Will it explode?”)
I really like the combo of dial gauge and weighted valve on the All-American. I could turn around to do dishes in the sink or look down to read a book while continuing to monitor the pressure in the canner by ear. Little reassuring rattles from the weight every thirty seconds or so told me the canner was holding steady at 10 pounds of pressure. Gauge-only canners, as I understand it, require that you literally never take your eye off the gauge. What a drag that would be for 80 minutes of processing time!
I believe I will come to love this piece of equipment. I foresee jars of stock and stew and home-canned dried beans in my future. I suspect my pressure canner and I will have a long and happy relationship, though it was quite bumpy at the beginning.
When Blog Posts Have Addendums
The following is the series of emails I exchanged with John from All-American after receiving my first, heavily marked All-American 30 Quart Pressure Canner. This exchange may be useful to customers considering buying a pressure canner who want to evaluate what kind of customer service support they should expect from the manufacturer.
As I mention above, I strongly urge people thinking of buying one of these pressure canners to do so from a venue like Amazon or a local store which will provide independent exchange or return support if something goes wrong. If I had needed to do an exchange with All-American directly I would have been on the hook for the cost and hassle of shipping the base, and would likely have had no recourse at all on exchanging the lid.
That said, please note that all of my exchanges and conversations with John were very cordial and respectful. So it’s not that the customer service experience I had with All-American was poor, so much as not proactive.
From: Erica
Date: May 17, 2012 7:46 PM
To: John
Subject: All American Pressure Canner 30qt
Hi John,
Thanks very much taking the time to chat with me today about my 30 qt. All American pressure canner that I received from Amazon. As I mentioned, it has a number of flaws and blemishes that made the unboxing of this much awaited purchase truly disappointing.
I cannot emphasize this enough: I was a customer who was happy to spend $300 on what I was sure was the best pressure canner I could buy. I was prepared to love your product and rave about it to friends (I have a number of friends who are very interested in “taking the plunge” into pressure canning, too, and were waiting to hear about my experience before buying their own canner). Instead I was so disheartened by its quality when I opened the box that I actually cried when I saw it.
Your company needs to know about this kind of customer reaction. Your quality control people need to know about it.
I can’t live with the number and extent of the flaws in the canner I received. Even if they do not affect the performance of the canner, I cannot spend $300 on something with so many blemishes right out of the box. I have decided to exchange the canner through Amazon. Their excellent returns policy means that I am being sent a new 30 qt. All American Canner, and the one I am currently in possession of is being taken back at no expense to me.
I consider the replacement canner to be a real test for the All America quality, which until this point I had heard nothing but raves about. If it too arrives with blemishes, pits and dings as did the first one, I will sadly return it and look at other brands of canners. I truly hope the first canner I received was not representative of typical All American finish quality, and I eagerly await the chance to love my new canner.
I am enclosing photos of the blemishes my canner arrived with. When we spoke you said that markings like I described over the phone were part of the molding and unmolding process. I suspect I may not have emphasized the extent of the various markings enough. You said your company had made the cost saving decision to no longer polish out these surface imperfections. I completely understand that you need to do what is necessary to produce a competitive product, and I further understand that you are competing against canners made in China and South America. However, I would respectfully suggest that people buying your canners are doing so, and are willing to spend hundreds of dollars on them, because they are represented as the best investment one can make in this arena. I believe that to maintain your reputation for superior quality, it is essential that your company get the details, including the aesthetic details, right.
These pictures below show a product in which the details have not been gotten right. If it is my expectations which were flawed, and this is typical of All American canners, kindly disregard this email. If, however, this canner was one of those flukes that happen, perhaps these photos and this email will help your QA team understand the risks to customer satisfaction that sending along a product like this can cause. I am giving this product another shot. I suspect many customers would not.
Respectfully yours,
Erica
[Photos Included]
From: Erica
Date: May 21, 2012 2:37 PM
To: John
Subject: Fwd: All American Pressure Canner 30qt
Hi John,
I received my replacement All American 30 qt Pressure canner from Amazon. It is in much better shape than the first one I received. Although there are small marks on the lip of the canner from the unmolding, and there are a few small pit marks on the lid it is nothing like the combination of blemishes on the first canner. I am satisfied with the second canner sent to me from Amazon and will be keeping it. I look forward to putting it to good use.
I haven’t heard back regarding the email and photos I sent Thursday the 17th, and I wanted to let you know that I will be writing about my experience purchasing this pressure canner on my website and give you the opportunity to respond to my original email before I did so.
My post will likely go live tomorrow or Wednesday morning. You will find my website here: www.nwedible.com
Respectfully yours,
Erica Strauss
From: John
Date: May 22, 2012 6:26 AM
Subject: Re: All American Pressure Canner 30qt
To: Erica
Good Morning Erica,
I was out of town yesterday [redacted to protect privacy]. So I apologize for not getting back to you sooner.
I did look at the pictures and this unit was pitted more than the norm. I would have not been happy as well. The biggest flaw which surprised me was the deep scratch on the bottom. I have spoke with my assembly line and made them aware of their inspection. I do apologize for any inconvenience this may of caused and want to thank you for choosing an All American Pressure Cooker. If there is anything else I can do, please let me know.
Sincerely,
John
How To Right-Size Your Lawn: In Defense Of (A Little) Turf
Something amazing has happened. I no longer loathe my lawn.
For nearly ten years, I have hated my lawn, and muttered curses at the landscaper who insisted that, “with small kids, grass really is the easiest thing to maintain,” before hydroseeding everything in sight.
Lies, damn lies.
I am no shirker. In fact, I like physical work. I haul heavy things, move rocks, rake compost, pull weeds, build trellises and garden beds, muck out chicken coops and horse stalls for the manure – all without complaint. I can deal with all manner of wiggly, creepy, bug-like creatures without shrieking, and I never, ever worry about my non-existent manicure. I am not, in a word, a girly-girl.
But I just don’t do mowing. Put a gas-powered mower in front of me and I totally pull the gender card. “Um, honey? Maybe you should mow…sorry, that’s a guy chore.”
This is of course ridiculous. There is nothing sex-specific about the ability to cut grass. You know who mowed the family lawn when I was growing up? My mom.
But it’s the whole pull-start engine thing. I don’t like any machine that requires a bent-over row to start. I might possibly picture rocks flying out of the lawn mower at high speed at my child’s head. I might possibly be a little scared of the whole contraption. Maybe. But if you say so, I’ll deny it.
Whatever. This is the only thing I “pull girl” on, and I’ve made my peace with it. Many years ago, I made my unwillingness to use our perfectly good gas rotary mower known to my husband. In those days he was routinely working from 6 am until 11 pm, and he made equally known his unwillingness to spend any of the precious non-work hours he had doing anything except spending time with his wife and then young daughter.
And so we perma-lent the gas mower to friends and hired a yard service, and for well over half of the ten years that I’ve hated my lawn, a hired someone else has been mowing it. Every year, the lawn shrank and the garden grew, and the yard service people had a little less to do. Periodically I would call up and renegotiate my monthly rate because, well, the job was literally shrinking every fall and spring.
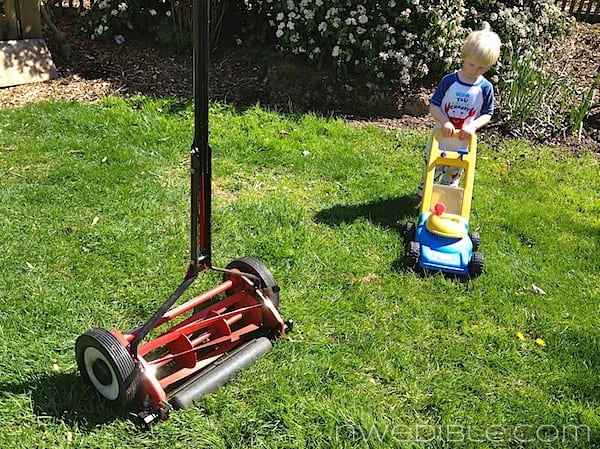
I’ve been laying in my plan for ditching the lawn service completely for awhile now. I thought the solution to the lawn service dilemma was a push mower, which did not intimidate me at all, but I wanted to try out push reel mowers before making the big plunge. I put out a plea on Freecycle for a push mower. A nice older lady happily gave me a gorgeous and, as far as I could tell, barely used mower that cuts like a dream. I ran it through the paces once or twice and was sold on the concept.
Push mowers are fun! And easy! And not scary or noisy or gross smelling! This was clearly the lawn answer I’d been waiting my whole life for.
But then I totaled my car, had eye surgery and couldn’t see for several months. The second half of 2012 became like lost time. Plan delayed. Lawn guys kept. Life on triage.
Until a few months ago. In one big final cover up, Homebrew Husband and I smothered a big stretch of useless, hard-to-mow, sidewalk-adjacent lawn with cardboad and woodchips.
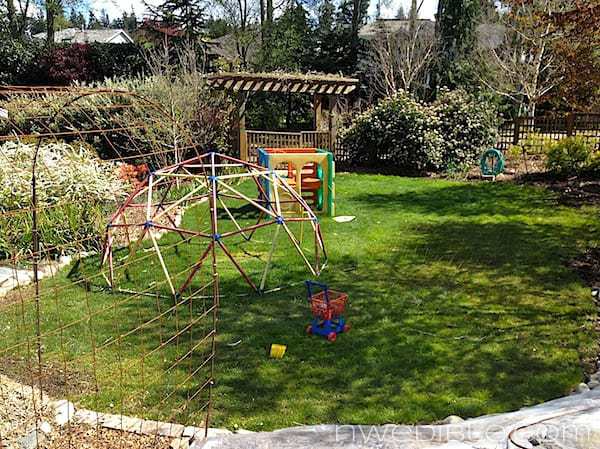
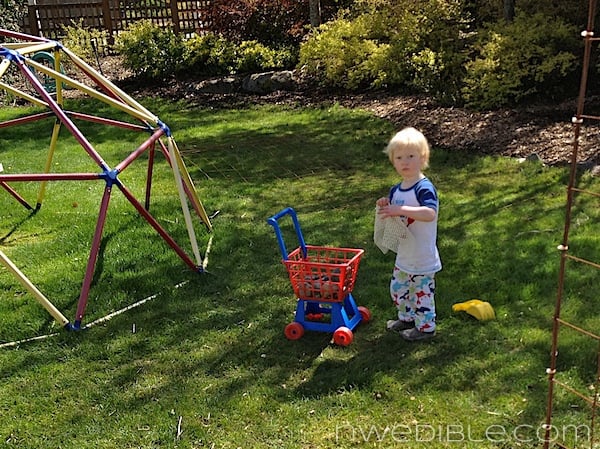
And in doing so, we reduced all the lawn on our property to this. One smooth, unbroken bean-shape of grass. That’s it. All the lawn in this picture is all the lawn we have. It’s about one-fifth of what we started with nearly ten years ago, maybe less.
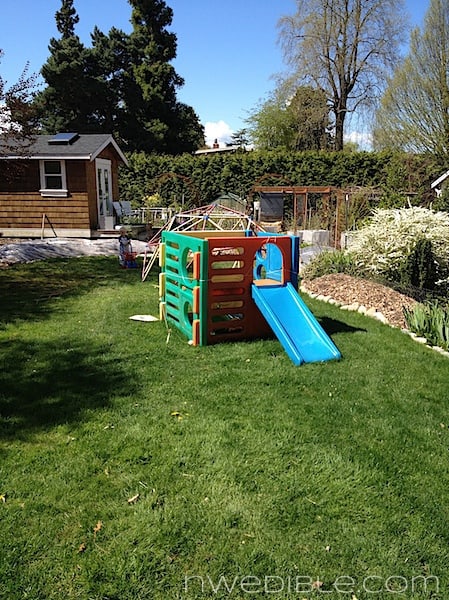
To put it in perspective, the main lawn used to stretch in a wide ribbon to the cedar hedge way, way in the back of this photo. The shed, greenhouse, chicken coop, hugelkultur beds, etc. – that was all grass originally. And then there were vast islands of grass elsewhere on our property that did nothing except piss me off.
Now, there are no weird hard angles to manage, no slopes, no stupid little fjords of grass that need special back-and-fill mower negotiation. It’s simple to mow. It’s big enough for kids and chickens and projects but small enough for me to push-mow while my son plays near me. No rock-brainings possible.
Our lawn is, finally, after a decade of chipping away at it, right-sized. So I made the call and let the lawn service go, which saves us some serious cash every month.
And in paring the grass back to just what makes since for our family, I’ve found myself really - shockingly - appreciating this patch of turf. Which doesn’t mean we’ve gone all putting-green fussy about our lawn. There are weeds mixed in with the grass and we won’t win any Home & Garden awards in summer when we let the lawn brown out instead of watering it.
But I love this little round of lawn now. It feels just right.
Turfgrass is usually portrayed in our community as the enemy of productive space, and I get why. I remember every single reason I hated my huge swath of stupid, useless, pain-in-the-ass grass. But now that my own personal lawn is right-sized for our life, I find there are very justifiable functional reasons to have a patch of grass.
Awesome, Functional Things About A Right-Sized Lawn
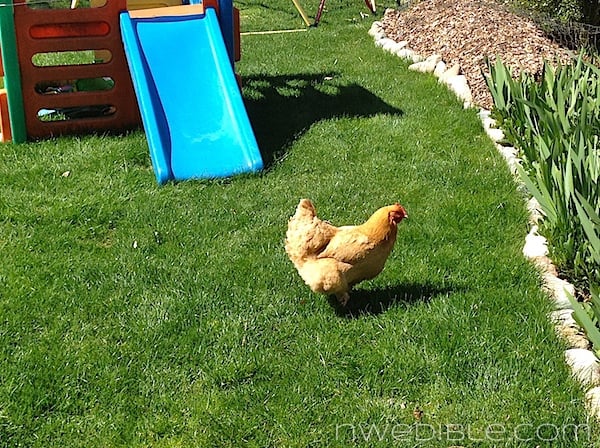
- Chickens grazing – better quality eggs and lower feed costs. (Plus chickens “pay it back” to the grass with manure that eliminates the need for supplemental fertilizer.)
- Kids running and climbing – happy kids within earshot means more time for gardening.
- Backyard Picnics – keeps dinner messes outside, cuts down on clean up time inside.
- Reading on the grass in the sunshine – keeps the need for therapy at bay!
- Space to assemble – roll out concrete mesh, put together new raised beds, hang plastic cloching material or row cover fabric up to dry before storage, etc.
How Much Is Enough?
So how can you know how much lawn is right for your family? Well, if you are like me, just keep making it smaller until the hatred goes away and then you’ll know you are at the right size.
But if you are in a planning mode, a few things to consider:
- All manner of creatures like a glade. Your lawn can be like your home’s glade. Try to figure out how large a glade your creatures will really benefit from. Are any of the following creatures members of your household: kids, dogs, chickens, other animals? If so, maintaining a slightly larger lawn might be worth it to you.
- Site considerations: slope, shade and boggy-soil are the enemies of a healthy, easy-to-maintain lawn. Why fight to grow a lawn on a shaded North-facing slope that never truly dries out? Find a more appropriate groundcover. Maybe try Sweet Woodruff instead.
- Construction considerations: if you do a lot of productive garden projects, like we do, having a flat level patch of ground for building, assembling, etc. can be invaluable. We find it’s easier to build our raised-bed boxes on the lawn and then just carry them into the garden area than to attempt to build in the more confined space of the garden.
- If you live in urbia or suburbia, there is really no excuse to have a lawn so large it requires a mini-tractor to mow. I might go so far as to say there’s no excuse to have a lawn so large it requires anything other than a manual push-mower. If you live in the country, your grass can be as large as your flock of sheep need.
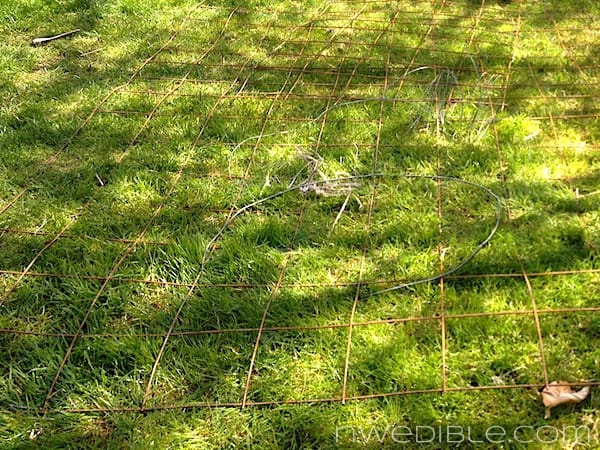
A flat piece of grass makes a great surface for rolling out concrete mesh and doing other garden projects.
So, for the first time in about a decade my goal is not to kill more lawn this fall. Amazing!
How much lawn do you have? Does it help or hinder your garden goals?
Biweekly Menu Planning Form (Free Downloadable)
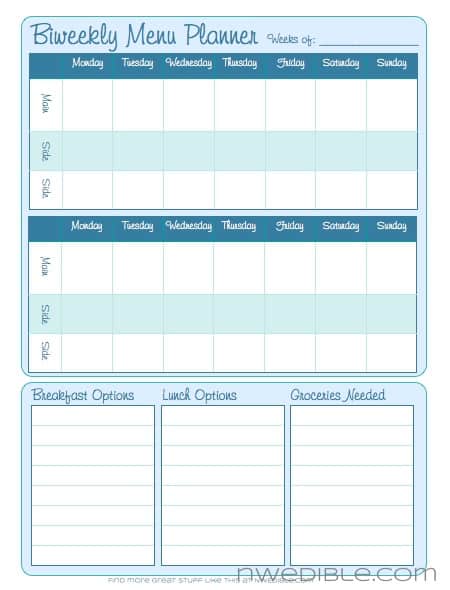
This year, with my son in preschool, mornings are spent shooing two kids along and getting everyone out the door on time. The AM has to be far more regimented, and fast breakfasts and easy, (often make-ahead) lunches are essential. We are also doing a lot more freezer-meal cooking to streamline dinner these days and my old menu planners just didn’t feel optimized any more.
So, I’ve created a new, Biweekly Menu Planner and I wanted to share it. Never be afraid to change your organizational tools to suit what works for your life as it is now. The whole point with organizational stuff is, it’s supposed to make your life simpler, not be a straight-jacket.
This menu planner has space for lunches and breakfast options in list form, with more detail spaces for dinner. This format seems to suit my life with two-kids-in-school at the moment.
Here’s an example of how I use this planner:
I wasn’t sure if people would want the “starch/veg” designation or the more versatile “side/side” option down the side, so I made versions with both. When you download in PDF, just print out the page that works for your menu planning style.
Download
You can download this free Biweekly Menu Planner in PDF on the Downloadables Page. I hope you find it helpful!
To Do In The Northwest Edible Garden: February 2015
Ladies and gentlemen, it’s February. You know what that means? It’s time to get going. I can feel it, and I’ll bet you can too – that little twitch in your hand that says, “alright, baby, let’s start some tomatoes!”
February typically marks the beginning of the big seed starting effort around here. Not just this year’s crop of tomatoes, but nearly all of the first round of brassicas can be started this month.
So, let’s get going. Spring is on its way.

Plan and Purchase
No pressure, but by now you should have a pretty good idea what you will be growing and where you will be growing it.
Seeds
If you’re still finalizing your seed order, check out my favorite seed house and a periodic sponsor of this blog, High Mowing Organic Seeds. They have a nice variety of high germination, 100% organic, verified GMO-free seeds. They now offer free shipping! Yay!
Feeling overwhelmed? Here’s a few resources for planning your garden and your seed order this year:
- Seed Selection Made Very, Very Simple
- How To Pick Your Vegetable Seeds Without Going Crazy
- How To Make Succession Planting and Year-Round Gardening Really Work
- Garden Yield Planning
Order your seed potatoes ASAP for best selection. Popular and rare varieties tend to sell out quickly. If you’re a true potato junkie, Irish Eyes has the widest selection around, all certified organic.
Perennials
If you didn’t do it last month, now’s the time to order perennials, like fruit trees, shrubs, rhubarb and asparagus. These should be planted as soon as they arrive, while still dormant.
This month you’ll start to see bare-root fruit trees, bushes and canes at nurseries, but the best selection will be mail order. I have ordered from Raintree Nursery many times (their catalog is total garden porn) and always been happy with the plant quality and customer service. Readers have also recommended Cloud Mountain Farm as a good supplier of fruit trees.
- Rhubarb Crowns
- Asparagus Crowns
- Bare Root Fruit Trees
- Bare Root Fruit Bushes
- Bare Root Cane Fruit & Vines
- Hop Rhizomes
Gear
All this seed starting info assumes you have what it takes to grow great seeds into great little seedlings. And, sad to say, in the Pacific Northwest that’s not just a South facing window.
- Read my opinionated take on which seed starting supplies are worth your hard-earned cash and which aren’t.
- I’ve been getting a ton of questions about grow lights lately! I upgraded last year to a T5 grow light (pictured below) and it’s been a dream. I’ll do a full post about my new grow light setup soon, but this is the grow light I have and it’s awesome.
Prepare and Prune
This is a great time to start thinking about warming your soil where you’ll be planting heat lovers like tomatoes and peppers.
If you aren’t opposed to using plastic in the garden, pin black plastic down over your beds for extra heat and weed suppression. Clear plastic actually warms soil even better, but allows weeds to germinate like crazy. If you plan to leave plastic on your beds the whole season and just plant through it, make sure you have a soaker hose or something to irrigate under the plastic.
You can also erect your low tunnels and cloches at this time of year, to help winter-water-logged soil dry out and warm. By the time your transplants are ready, the soil will be too.
There’s still time to handle dormant season pruning and spray fruit trees with dormant oil to control mites, scale and overwintering buggies. See the January To Do list for a recipe for my DIY All Natural Dormant Oil Spray For Fruit Trees.
Start Indoors
Whoa boy, here we go.
Perennials
- Asparagus: if you want to try growing asparagus from seed, you have to start now – the seeds can take almost a month to germinate. Personally, I’d buy 1 year old crowns from a good nursery or mail order seed company.
- Artichokes: I grow Green Globe and Violetta.
- Strawberries: I wouldn’t bother starting common garden strawberries from seed, but some of the rare alpine types might be worth a go from seed.

Brassicas
- Broccoli: early varieties should be started under lights this month for planting out under a cloche at the beginning of April. All around, I really like Belstar. It’s just a solid broccoli all year round. Some seed companies do broccoli blends, which are useful to home gardeners who don’t want to worry about succession planting. Territorial offers a good one.
- Brussels Sprouts: early varieties should be started under lights mid-month for planting out under a cloche at the beginning of April. I prefer Brussels Sprouts as a cool season crop, and will start them in June to mature in mid-September for harvest through fall and winter.
- Cabbage: Be very careful about variety selection here. You want an early cabbage with a maturity date of around 60-80 days. The really long maturing cabbages are better suited for fall. Farao was the standout variety in my garden last year. Hands down the best spring cabbage I’ve ever eaten. Start under lights mid-month for planting out under a cloche end of March/ beginning of April.
- Cauliflower: A bit more finicky than other brassicas, give special attention to your cauli seedlings with consistent moisture and lighting and regular organic feeding or slow release fertilizer in the grow medium. Early varieties should be started under lights late this month for planting out under a cloche at the beginning of April. I like Snowball, and Romanesco did very well for me last year too.
- Kohlrabi: I’m growing Lech this year, which performed better for me last year than any spring kohlrabi I’ve yet tried. I still find this this crop easier to grow for fall (use a large hardy kohlrabi like kossak for that) but Homebrew Husband adores kohlrabi so I’m trying to grow more of it.
- Kale and Collards: If you want early cooking greens you can start them now. If your space under lights is limited, wait and sow them out directly under a cloche next month. Both these crops germinate and grow well, even in cool soils. I’ll grow collards in the fall (champion is a fine vates-type) but I’ve already got my lacinato kale going from saved seeds.

Nightshades
- Tomatoes: If you don’t mind fussing with your tomatoes and if you have good strong grow lights and if you are planning on season extension, you can start your toms in February with plans to up-pot to gallons if necessary and transplant to a pre-warmed, tunnel-cloched bed in late April, depending on weather. If you just don’t want to put that much work into it, wait a month. I’ve had good results with Moskvich, Striped Roman, Amish Paste and most of the cherry-types. In a recent discussion on my Facebook page, many people weighed in with their favorite tomatoes and now I want to grow all the tomatoes.
- Hot and Sweet Peppers: I start these at the same time as tomatoes, knowing they will need more babying than ‘maters and will take longer to grow big. That extra grow-time on the bench is fine, since peppers can’t go out to the garden until June some years. I consistently have the best luck with King of the North bell peppers.
- Eggplant: How many eggplants are you really gonna grow? Give these another month or two before you start them because they are quite tender. Or just buy quality starts in early June.
- Potato: These you don’t really “start” but you can chit your seed potatoes to get a jump start on the season.
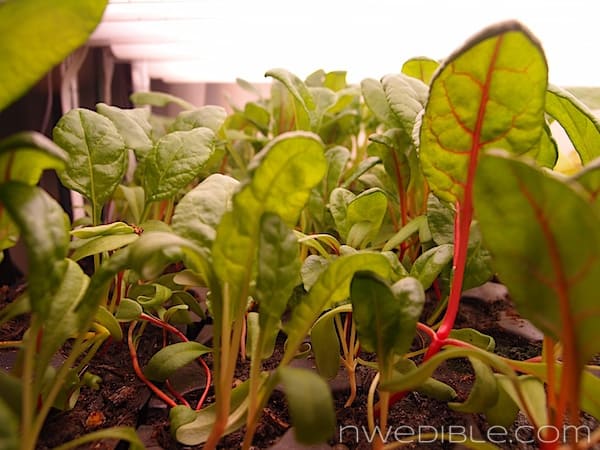
Leafy Greens and Herbs
- Chard: Start indoors now or wait a month and sow out directly. I grow rainbow chard.
- Salad Greens: Aim for a salad green sowing every month. New month? New sowing of lettuce, etc. That’ll give you edible salad greens in some stage of growth through October. It’s still quite early, so stick to the cool-weather cultivars like Winter Density.
- Spinach: Updated advice: I have now decided spinach is not a good crop to start indoors. You go right ahead if you want, but I recommend broadcast sowing this crop outdoors for better results.
- Herbs: now is the time to sow seed for parsley, lemon verbena, chives, fennel, borage, chamomile, chervil and johnny-jump-ups (yes, they’re edible!)
Other Stuff
- Onions and Summer Leeks: You started these guys last month, right? If not, you’ll want to jump on it now or we’ll be buying Walla Walla sets at the nursery together. You’ll want long-day or day-neutral onion varieties if you’re in the Northwest. No short-days.
- Peas: For the earliest possible harvest, start these inside in a length of gutter. Transplant them out to a cloched bed when they are a few inches tall and plan for early peas.
Sow & Plant Outside
Seeds
- Peas: George Washington’s birthday (2/21) is the traditional time to sow peas. If the soil has warmed up and isn’t waterlogged, and if you didn’t sow peas indoors, the end of February is a good time to get them in the ground.It’s been warm and dry-ish lately, so that might be just about perfect this year. If the soil still seems really cold and wet where you are, wait a few more weeks. Pretty much all peas grow well in the Northwest. I focus on Sugar Snap types.
- Favas: Direct sow anytime. When I grow favas, I grow the huge-seeded Broad Windsor.
- Garlic: You don’t have to do this because you got your garlic in last fall so it’s already showing 6 or 7 inches of shoot, right? Right? Oh, well, not to worry! Just stick some in now. Your garlic heads will be smaller but you’ll still have homegrown garlic.
- Salad Greens, Spinach, Asian Greens & European Greens: sow out the hardiest greens under cloche for the earliest possible direct seeded new crop greens. I rolled the dice and broadcast some arugula a few weeks ago and it’s up and growing already!
- Radishes: the little globe ones. Try a pretty mix like Valentine’s Day.
- Onion Sets: for early green onions, you can plant sets now and use them before they bulb.

Perennials
With these perennials, pretty much if you can buy it right now, and the ground can be worked without turning to mud, you can plant.
- Bare root fruit trees: these should be put into previously prepared ground while still dormant.
- Bare root fruit bushes: These are your currants, gooseberries, blueberries, etc. Just like the trees, get these in the ground while still dormant.
- Cane fruits: Blackberries, raspberries, etc. available bare root now.
- Rhubarb crowns: These can be had by dividing established plants, ordered online, or purchased at a good nursery.
- Horseradish roots: these can be invasive! It’s a good idea to plant them in a very large container sunk into the ground to control their roaming. Of course, I didn’t listen to myself, I just stuck them in the ground last spring and now the roots are as big as my wrist and I’m kinda screwed. Oh well.
- Asparagus crowns: Easier than seed, these look like shriveled up sad, brown baby octopi when you first pull them out of the bag. They’ll settle in, though, and in a few years they will be monster plants with roots 8 feet deep. Asparagus is cool like that.

Harvest
I’ve got nothing in my garden right now but mache and kale, but maybe you do? At this time of year in the past, I’ve harvested:
- Brussels Sprouts
- Overwintering Cabbage
- Carrots & Parsnips
- Kale and Collards
- Overwintering Cauliflower
- Sprouting Broccoli
- Winter Kohlrabi
- Chard
- Leeks
- Turnips & Rutabagas
- Protected Salad Greens, Asian Greens and Euro Greens
- Jerusalem Artichokes
- Stored Winter Squash
- Stored Potatoes
- Celeriac

What are you doing in your garden this month?
Reader Questions: Expanding The Garden, Best Gardening Tools, Sand In The Chicken Coop & More
I’ve been sitting on a pile of Reader Questions for awhile. I love your questions – they’re the best source of inspiration and really help shape what I write about!
It’s my experience that if one person has a question, 20,000 people have that question. And if I don’t have an answer – one of you will, because readers of this blog are very smart people (also witty, charming, and exceedingly good looking).
So I think it’s time to haul our Reader Question series out of mothballs and tackle a few, don’t you?
This round: expanding a garden in Spring, the best gardening tools, why we homestead, sand in the chicken coop and more.

Best Way To Expand My Garden In Spring?
We are expanding our in-ground garden (yes I should have started in the Fall but with early pregnancy sickness I was too damn lazy). How do I expand the garden this late in the year? Right now it is sod. We have a rototiller and we also own a tractor but everything I have been reading is telling me to not disrupt the soil with those means.
The more I read, the more confused I am. I know you utilize raised beds but was wondering if you had any recommendations. Thank you for reading this drawn out email and thank you for the time you put into your blog.
Steph
Start here. Then, if you have time, watch this.
I’d start by covering your sod where you want to garden with plain brown cardboard. Then I’d make deep-bed lasagna garden type mounds atop the cardboard with every bit of organic matter you can find – old straw, rotten manure, compost, chicken bedding, kitchen scraps, the worm bin contents – whatever you’ve got. Try to get 12-16 inches deep. Then top with a 4-6 inch layer of wood chips. Don’t mix wood chips in – keep them on top. Do this all right atop the cardboard-covered sod.
Then I’d cover the bed mounds with black plastic to help retain heat in winter and encourage microbial life to form as much as possible. You’re basically doing a giant compost-in-place bed at this point.
You can layer in mineral amendments right along with your organic matter no problem. In fact it’s a good idea to add some slow release nitrogen, like seed meal, to the mix as you go, just to counteract the nitrogen tie-up from the decomposition process. If your chicken bedding is sufficiently poop-covered don’t worry about this.
In spring, plant stuff that’s transplant-y, like tomatoes and squash, into the bed and make a kind of “hole” of potting soil within your mounds that you transplant into. This gives the plants a more “finished” soil around their baby roots, then as they grow they will go out into the mound to find what they need.
By next spring the whole thing should be so nicely broken down that you can direct seed without issue.
Advice on Homesteading in Bend, Oregon?
We are moving from Southern California, where we have a 10′ by 10′ backyard garden, to Bend, Oregon and 20 acres. I get to be the gardener in charge of growing as much food as possible for our 2 families. I am super excited but feeling overwhelmed. Any direction you could give this Northwest newbie would be much appreciated!
Jen
I’ve been to Bend a few times. It has a very unique, and a little challenging, climate. You’re basically high desert up there – so expect extreme temperature swings day to night, late frosts, and not too much rainfall.
If the goal is maximum food production, I’d look at setting up a hoop house as early as you can. The added season extension and moderating influence of crop protection for that climate will make a huge difference in your ability to consistently get two crops per year per chunk of land.
Grazing is good in Bend as I recall – goats might be an ideal livestock for you. Be very sensitive about water use and water catchment. The cheapest place to store water is in the ground. If you aren’t familiar with permaculture, please investigate swales on contour for an idea of how effective passive water harvesting can be if you just dig your ditches right.
Geoff Lawton has a series of free videos that might be useful. They are behind a subscription firewall, but they are free and totally worth it. On 20 acres, with thoughtful design, you can build yourself a paradise.
Any gardeners from Bend able to weigh in on this?
What Are The Best Gardening Tools?
Do you have any advice on selecting the best gardening tools?
Chris
I sure do!
First – you need fewer things than you think. Second – some of my favorite gardening tools aren’t super expensive. So while you do generally get what you pay for, there are some really clever tools out there that don’t cost an arm and a leg.
I recommend skipping the “garden sets” that you see at big box stores – you know, they usually have a trowel, a hand fork, some useless cotton gloves, and a bucket. Those things are terrible.

Here are my top 5 essentials:
1. Gloves
For almost everything, you want a soft, flexible glove with nitrile dipped fingers to keep your hands dry and give you great grip. I buy mine 6 pairs at a time, so I (usually) manage to have a complete set clean and dry. Gloves like this are great.
2. Japanese Hand Tools
I far prefer Japanese style hand tools for gardening. I use a Japanese handheld hoe, a Japanese sickle, a claw cultivator and a handheld pick-mattock pretty much every time I’m out in the garden.
3. Pruners
The last name in hand pruners is Felco, and they make some exceedly great tools. But, I discovered last Spring that Costco has released a Kirkland signature brand of hand pruners that are perfect Felco knock-offs. So if you’re a Costco member and you want to save some coin, check out the house brand clippers.
With the money you save, you can buy a Felco folding hand saw – essential for pruning anything too large to tackle with your pruners.
4. A Good Hoe
Slop giggling. We all need a really great hoe.
I strongly prefer the style of hoe called stirrup, scuffle or hula. This type of hoe looks like a metal stirrup, like you’d find dangling from a horse’s saddle. It cuts weed roots on both the forward and back stroke, and I feel strongly that a hoe should do excellent work on both the push and the pull.
I’m not too picky about brand. This one gets good reviews.
5. Metal, Flexible Rake
I love rakes! I have 6, I think. But my absolute, all purpose favorite is my spring metal rake. This is a rake with about 9,000 tines*, all made of thin, flexible metal. Again I’m not a snob about brand – I just want something sturdy, with tines that keep their shape and a handle that will last despite my inevitable neglect. The rake I love is very similar to this one.
*Slight exaggeration
How Is The Sand In The Chicken Coop?
Do you still use sand in your coop? Also, what do you recommend to use as a floor in any outside runs? I don’t have grass in the area I want to make an additional run and wondered what would be best to put down.
Ellie
I do still use sand, and I really like it! The coop floor and inner run are both sand, and we’ve been very happy with how it’s performed. Our yard has a high water table and the improved drainage from the sand has helped keep the coop clean(ish) and dry.
In the outside run, I typically use arborists wood chips because they are free, high carbon, and great at absorbing chicken poo. When the chicken manure and wood chips are composted together, they make a really lovely soil amendment. I don’t recommend straw outside in the Pacific Northwest – if it stays wet it tends to mat down and get quite moldy and full of icky spores.
Help! Great Looking Greenhouse?
I need a plan to build a greenhouse that looks great architecturally and is large enough to possibly accommodate some in-ground tomatoes, to extend their growing season.
I know that this may be out of the realm of this forum, but that is what I need. :-)
Bob
It’s true – once you go greenhouse, you never go back. The greenhouse I have – a small Juliana model – is pretty functional looking. For a really architecturally handsome option, I’d guess you’re hoping for something like this:

Unfortunately, of course, greenhouses like this come with a price tag to match their splash.
LSU’s Ag Department has a pretty comprehensive selection of greenhouse plans. I’d start there and see if anything strikes your fancy, then modify plans as needed to give you the look you’re after.
Do you know of any really great sites for greenhouse plans?
Why Do You Homestead?
Why do you homestead? I mean, I think there are lots of answers to the question and a main one would be to know where our food comes from but why is that important to so many people all of a sudden? I’m pretty fascinated by the ‘why’ of people’s actions.
Melina
Yes, it’s saving money and food confidence and the political statement and the lovely challenge of it all. But more than that, it’s simply that I love the life.
I can’t answer this question for anyone but me, of course, and homesteaders come in all shapes, sizes, and acreage levels. But I feel like I’m more who I really am when I live this way. I feel like my practical life is more aligned with the values that shape my aspirational life. And the feeling of closing that gap makes me happy.
I suppose I could embrace the good fortune that allows me to be a stay at home mom and spend my hours shopping at Target and getting my toes painted (I do live in suburbia, after all), but that kind of thing makes me want to punch myself in the throat. So I do what I do because it feels like a more honest expression of me. And that makes me happy.
Want more? I tackled this issue in a bit more depth here back in 2012.
This answer will be different for everyone – so tell me, why do you homestead?
Want to ask me a question?
It’s easy, and I’d love to feature your question on next month’s Q&A! Just follow these steps to make it easier for me to answer your question:
- Send me an email with “Question for Erica” in the subject line.
- Ask your question in one or two sentences.
- Start a new paragraph and provide any additional details that are relevant to your question.
Thank you!
Reader Questions: February
I can’t let February sneak past without doing a reader question post. This month: fermentation lids, peppers that will ripen in the Northwest, litter for chicken coops and more.
We also have Community Questions asking for suggestions, advice or resources for gardening in Central America and Florida. I’m not knowledgeable enough to answer, but maybe you can help?

Do I Need To Use A Crock Cover For Fermentation?
What is the purpose of the crock covers I see marketed and what benefit would they offer me?
I’ve been making 5 gallon batches of kraut and pickles for a few months now. I typically leave the crock in the basement while it ferments and every day or three I skim off the scum (yeast as I understand it). I cover my crocks with a towel as they are going to keep out any dust/young children.
Clinton
So just for folks who aren’t sure what Clinton’s talking about, we don’t mean the inner weight you’d use to keep your fermenting vegetables submerged. We’re talking here about an outer cover designed to keep dust and contaminants out of your ferment.
The classic, straight-sided stonewear crocks without a water moat like these are often sold without a cover. But if you want a lid, you can buy one as an accessory. Here’s a picture:

These lids for straight-sided crocks are totally optional. They aren’t going to make the difference between a failed and a successful ferment. That said, they do offer some advantages.
- While not air tight, the covers will slow down oxygen exchange to your ferment as compared to a towel.
- They are going to be more effective at keeping dust, airborne yeast, and similar contaminants off your ferment than a kitchen towel, simply because they aren’t porous like cloth, so you will need to remove scum from your ferments less often.
- They are opaque, so light will not damage your ferment.
- They are heavy, so they are unlikely to be blown, snagged, or accidentally knocked off your crock.
- They promote temperature stability in your ferment by adding additional mass around your ferment.
So these covers are useful, but the truth is, any solid, earthenware plate with a lead-free, food-safe glaze of an appropriate size would provide similar advantages. Traditionally, lots of folks made wooden lids to cover their crock.
You mentioned young kids. If you are keeping your crocks someplace where kids might get into them, it’s worth considering if a heavy and breakable lid is maybe not a better option than your towel – I’m just thinking of my son sliding something like a ceramic crock cover off and then dropping it right on his feet. Cause he would do something like that.
If kid safety isn’t an issue, you can use a heavy plate to test-run the utility of a heavy, opaque lid. If you find that cover cuts down on contamination and the amount of skimming in your particular situation, you might decide investing in the dedicated crock lid is worth it.
Sand Over Concrete Floors In A Chicken Coop?
I have a question regarding the floor of my coop. We live on an old dairy farm and are converting the old “milking room” into a coop. It has concrete floors. I had planned on covering the floor with straw until i read your blog on using sand. Any thoughts or ideas? I’m hoping concrete won’t be a problem.
Thanks
Denise
I’ve been really happy with how clean sand had been in our coop, but I can’t imagine that sand would be a cleanliness advantage over straight concrete.
A search for “coop floor sand over concrete” brought me to this tale of coop sadness, from a woman who said her sand-over-concrete coop floor was a stinky mess any time it got wet. Her report enhanced my skepticism about sand over concrete.
Brilliant readers, anyone want to weigh in on this?

In terms of non-sand options, I don’t know if you are thinking a deep-litter, compost-in-place type system, or just a layer of straw to give your hens a more comfortable grip as they walk. There are many advantages to a deep litter system, but to do it successfully the litter needs access to micro-organisms.
I’ve only ever done deep-litter over dirt, but I’m sure with a bit of patience and perhaps an inoculation of your litter with some good garden soil you could make it work over concrete. If just might require a bit more fiddling than it would over soil. This is a good article on deep litter coop maintenance if you want to go that route.
In your situation, I’d honestly be excited to have a concrete floor ready to go in my coop. I think you’re gonna be really happy with it. I’d do some research to see if you want to seal the concrete in some way before it gets used as a coop, then for your birds I’d go with your original plan and lay down at least 4-6 inches of bedding over the concrete.
Straw is a fine litter as long as it stays dry. Wet straw is not nice. If you are rural, straw is very cost effective. Non-aromatic wood shavings or clean chips work well in my experience. I’ve also heard really good things about wood bedding pellets (like this) in coops. If you happen to live in an area where rice is grown, rice hulls are supposed to be great. (Hat tip to Root Simple for that tip.)
What Peppers Will Ripen In The Northwest?
I live in southwest British Columbia, close to the Pacific ocean, so we are blessed with a so-called Mediterranean climate, but we have summer fog all summer long, even when it is not visible. Two of my favorite vegetables, tomatoes and bell peppers, cannot be ripened outside, which is okay because I have a passive solar greenhouse.
But, bell peppers are still problematic (My tomatoes are beyond excellent, I have been told). I have not found a variety of pepper that matures and turns red early enough to harvest a reasonable quantity to get us through the winter – any suggestions?
Mike
King of the North is my favorite red bell pepper for short season summers like ours. If you are ok with a sweet red pepper that’s not a bell-shape, try the Italian horn shaped peppers. Carmen is a great variety – reliable, sweet and thick-walled for a frying pepper. Gypsy used to be a favorite but I think it’s pretty much gone from seed catalogs now.
Just like cherry tomatoes ripen before beefsteaks, mini bells will ripen earlier than the full size peppers. The sweet baby bell peppers are probably worth experimenting with for your situation.

Convert A Crawl Space To A Root Cellar?
I live on very small piece of land in a 950 ft home. I’ve started to put up my veggies and have always made jams/jelly, Aigre-doux, etc. but that leads to my problem which is storing these goodies.
I have no basement or garage where I can keep things cool or have a second refrigerator. My house sits on a two foot crawl space though and I have been considering digging out some of that crawl space to create a makeshift root cellar.
Any creative ideas on how to go about this?
Karen
The amount you manage to grow in a small space is awesome. Well the first thing I want to clarify is that you don’t need a root cellar to store canned items like jams, pickles, etc. – jarred foods should keep fine at room temperature, though cool, dark storage helps preserve flavor and color longer.
If you are primarily looking for storage for your jars, any nook you can find or create in your home will do fine. I know space is at a premium but I feel like there must be easier ways to build-in additional storage as opposed to digging out a crawl space.

Where the cool, even temps of an underground root cellar really help are with fresh storage crops like beets, carrots, onions, winter squash, etc. and living ferments like sauerkraut. So if you are growing a lot of storage crops, I think a test-run of the crawl space root cellar concept is a really neat idea.
What if you got a plastic laundry basket – something with some ventilation holes – that would fit in your crawl space as it is now? I’m thinking you might put a selection of items you’d want to store in the root cellar – squash, beets, etc. – as well as a few jarred items – in the laundry basket. Then store this away in the current crawl space and try to get a feeling for how this space already works.
In terms of the actual conversion of your crawl space, I found some info on converting crawl spaces into basements, and while I think you’re talking about a much smaller scale excavation, this does not seem like a DIY kind of project. The trick is removing some of the dirt under the house without removing any of the dirt that’s important for keeping the house up. I’m getting a real, “a structural engineer should sign off on this,” vibe. Sorry. :(
Community Questions! Can You Help?
I have two reader requests for information of a regional nature. Unfortunately, neither region is one I’ve much knowledge of.
We live in a tropical island environment in Central America. I have searched for good tropical gardening reference books, bought a couple, but pretty much useless on much of the information. Anything you can recommend would be appreciated.
Cindy
and
If you have any info for Florida heirloom species, tips, insights, or thoughts, I would appreciate them.
Marshall
For both Cindy and Marshall, I’d point them in the direction of Geoff Lawton’s permaculture work. His does a lot of tropical and sub-tropical design. I’d definitely spend some time with Geoff’s stuff if you have questions about design or layout of your garden.
Kris from Attainable Sustainable (a great site if you don’t already follow it) homesteads in Hawaii – she might be in a similar enough climate to be helpful to you both.
I know Southern Exposure Seed Exchange has an amazing reputation for quality seeds that are well adapted to a Southern climate. I’d definitely point Marshall in that direction, and even Cindy might find SESE’s grow guides useful.
Other than that, I’m not familiar with many tropical/sub-tropical gardening resources.
Readers – Do you know of any great books or websites that might help Cindy with her tropical, Central American garden or Marshall with his Florida garden? Please share in the comments.
Want to ask me a question?
It’s easy, and I’d love to feature your question in a future Q&A! Just follow these steps to make it easier for me to answer your question:
- Send me an email with “Question for Erica” in the subject line.
- Ask your question in one or two sentences.
- Start a new paragraph and provide any additional details that are relevant to your question.
PS – I have this nagging feeling that someone sent me a question and I responded, “I’ll answer it in the Feb Q&A” and I haven’t. If that’s you, I’m sorry! I can’t find the original email – can you please re-send your question?
Thank you!
How To Right-Size Your Lawn: In Defense Of (A Little) Turf
Something amazing has happened. I no longer loathe my lawn.
For nearly ten years, I have hated my lawn, and muttered curses at the landscaper who insisted that, “with small kids, grass really is the easiest thing to maintain,” before hydroseeding everything in sight.
Lies, damn lies.
I am no shirker. In fact, I like physical work. I haul heavy things, move rocks, rake compost, pull weeds, build trellises and garden beds, muck out chicken coops and horse stalls for the manure – all without complaint. I can deal with all manner of wiggly, creepy, bug-like creatures without shrieking, and I never, ever worry about my non-existent manicure. I am not, in a word, a girly-girl.
But I just don’t do mowing. Put a gas-powered mower in front of me and I totally pull the gender card. “Um, honey? Maybe you should mow…sorry, that’s a guy chore.”
This is of course ridiculous. There is nothing sex-specific about the ability to cut grass. You know who mowed the family lawn when I was growing up? My mom.
But it’s the whole pull-start engine thing. I don’t like any machine that requires a bent-over row to start. I might possibly picture rocks flying out of the lawn mower at high speed at my child’s head. I might possibly be a little scared of the whole contraption. Maybe. But if you say so, I’ll deny it.
Whatever. This is the only thing I “pull girl” on, and I’ve made my peace with it. Many years ago, I made my unwillingness to use our perfectly good gas rotary mower known to my husband. In those days he was routinely working from 6 am until 11 pm, and he made equally known his unwillingness to spend any of the precious non-work hours he had doing anything except spending time with his wife and then young daughter.
And so we perma-lent the gas mower to friends and hired a yard service, and for well over half of the ten years that I’ve hated my lawn, a hired someone else has been mowing it. Every year, the lawn shrank and the garden grew, and the yard service people had a little less to do. Periodically I would call up and renegotiate my monthly rate because, well, the job was literally shrinking every fall and spring.
I’ve been laying in my plan for ditching the lawn service completely for awhile now. I thought the solution to the lawn service dilemma was a push mower, which did not intimidate me at all, but I wanted to try out push reel mowers before making the big plunge. I put out a plea on Freecycle for a push mower. A nice older lady happily gave me a gorgeous and, as far as I could tell, barely used mower that cuts like a dream. I ran it through the paces once or twice and was sold on the concept.
Push mowers are fun! And easy! And not scary or noisy or gross smelling! This was clearly the lawn answer I’d been waiting my whole life for.
But then I totaled my car, had eye surgery and couldn’t see for several months. The second half of 2012 became like lost time. Plan delayed. Lawn guys kept. Life on triage.
Until a few months ago. In one big final cover up, Homebrew Husband and I smothered a big stretch of useless, hard-to-mow, sidewalk-adjacent lawn with cardboad and woodchips.
And in doing so, we reduced all the lawn on our property to this. One smooth, unbroken bean-shape of grass. That’s it. All the lawn in this picture is all the lawn we have. It’s about one-fifth of what we started with nearly ten years ago, maybe less.
To put it in perspective, the main lawn used to stretch in a wide ribbon to the cedar hedge way, way in the back of this photo. The shed, greenhouse, chicken coop, hugelkultur beds, etc. – that was all grass originally. And then there were vast islands of grass elsewhere on our property that did nothing except piss me off.
Now, there are no weird hard angles to manage, no slopes, no stupid little fjords of grass that need special back-and-fill mower negotiation. It’s simple to mow. It’s big enough for kids and chickens and projects but small enough for me to push-mow while my son plays near me. No rock-brainings possible.
Our lawn is, finally, after a decade of chipping away at it, right-sized. So I made the call and let the lawn service go, which saves us some serious cash every month.
And in paring the grass back to just what makes since for our family, I’ve found myself really – shockingly – appreciating this patch of turf. Which doesn’t mean we’ve gone all putting-green fussy about our lawn. There are weeds mixed in with the grass and we won’t win any Home & Garden awards in summer when we let the lawn brown out instead of watering it.
But I love this little round of lawn now. It feels just right.
Turfgrass is usually portrayed in our community as the enemy of productive space, and I get why. I remember every single reason I hated my huge swath of stupid, useless, pain-in-the-ass grass. But now that my own personal lawn is right-sized for our life, I find there are very justifiable functional reasons to have a patch of grass.
Awesome, Functional Things About A Right-Sized Lawn
- Chickens grazing – better quality eggs and lower feed costs. (Plus chickens “pay it back” to the grass with manure that eliminates the need for supplemental fertilizer.)
- Kids running and climbing – happy kids within earshot means more time for gardening.
- Backyard Picnics – keeps dinner messes outside, cuts down on clean up time inside.
- Reading on the grass in the sunshine – keeps the need for therapy at bay!
- Space to assemble – roll out concrete mesh, put together new raised beds, hang plastic cloching material or row cover fabric up to dry before storage, etc.
How Much Is Enough?
So how can you know how much lawn is right for your family? Well, if you are like me, just keep making it smaller until the hatred goes away and then you’ll know you are at the right size.
But if you are in a planning mode, a few things to consider:
- All manner of creatures like a glade. Your lawn can be like your home’s glade. Try to figure out how large a glade your creatures will really benefit from. Are any of the following creatures members of your household: kids, dogs, chickens, other animals? If so, maintaining a slightly larger lawn might be worth it to you.
- Site considerations: slope, shade and boggy-soil are the enemies of a healthy, easy-to-maintain lawn. Why fight to grow a lawn on a shaded North-facing slope that never truly dries out? Find a more appropriate groundcover. Maybe try Sweet Woodruff instead.
- Construction considerations: if you do a lot of productive garden projects, like we do, having a flat level patch of ground for building, assembling, etc. can be invaluable. We find it’s easier to build our raised-bed boxes on the lawn and then just carry them into the garden area than to attempt to build in the more confined space of the garden.
- If you live in urbia or suburbia, there is really no excuse to have a lawn so large it requires a mini-tractor to mow. I might go so far as to say there’s no excuse to have a lawn so large it requires anything other than a manual push-mower. If you live in the country, your grass can be as large as your flock of sheep need.

A flat piece of grass makes a great surface for rolling out concrete mesh and doing other garden projects.
So, for the first time in about a decade my goal is not to kill more lawn this fall. Amazing!
How much lawn do you have? Does it help or hinder your garden goals?
Biweekly Menu Planning Form (Free Downloadable)
This year, with my son in preschool, mornings are spent shooing two kids along and getting everyone out the door on time. The AM has to be far more regimented, and fast breakfasts and easy, (often make-ahead) lunches are essential. We are also doing a lot more freezer-meal cooking to streamline dinner these days and my old menu planners just didn’t feel optimized any more.
So, I’ve created a new, Biweekly Menu Planner and I wanted to share it. Never be afraid to change your organizational tools to suit what works for your life as it is now. The whole point with organizational stuff is, it’s supposed to make your life simpler, not be a straight-jacket.
This menu planner has space for lunches and breakfast options in list form, with more detail spaces for dinner. This format seems to suit my life with two-kids-in-school at the moment.
Here’s an example of how I use this planner:
I wasn’t sure if people would want the “starch/veg” designation or the more versatile “side/side” option down the side, so I made versions with both. When you download in PDF, just print out the page that works for your menu planning style.
Download
You can download this free Biweekly Menu Planner in PDF on the Downloadables Page. I hope you find it helpful!
To Do In The Northwest Edible Garden: February 2015
Ladies and gentlemen, it’s February. You know what that means? It’s time to get going. I can feel it, and I’ll bet you can too – that little twitch in your hand that says, “alright, baby, let’s start some tomatoes!”
February typically marks the beginning of the big seed starting effort around here. Not just this year’s crop of tomatoes, but nearly all of the first round of brassicas can be started this month.
So, let’s get going. Spring is on its way.

Plan and Purchase
No pressure, but by now you should have a pretty good idea what you will be growing and where you will be growing it.
Seeds
If you’re still finalizing your seed order, check out my favorite seed house and a periodic sponsor of this blog, High Mowing Organic Seeds. They have a nice variety of high germination, 100% organic, verified GMO-free seeds. They now offer free shipping! Yay!
Feeling overwhelmed? Here’s a few resources for planning your garden and your seed order this year:
- Seed Selection Made Very, Very Simple
- How To Pick Your Vegetable Seeds Without Going Crazy
- How To Make Succession Planting and Year-Round Gardening Really Work
- Garden Yield Planning
Order your seed potatoes ASAP for best selection. Popular and rare varieties tend to sell out quickly. If you’re a true potato junkie, Irish Eyes has the widest selection around, all certified organic.
Perennials
If you didn’t do it last month, now’s the time to order perennials, like fruit trees, shrubs, rhubarb and asparagus. These should be planted as soon as they arrive, while still dormant.
This month you’ll start to see bare-root fruit trees, bushes and canes at nurseries, but the best selection will be mail order. I have ordered from Raintree Nursery many times (their catalog is total garden porn) and always been happy with the plant quality and customer service. Readers have also recommended Cloud Mountain Farm as a good supplier of fruit trees.
- Rhubarb Crowns
- Asparagus Crowns
- Bare Root Fruit Trees
- Bare Root Fruit Bushes
- Bare Root Cane Fruit & Vines
- Hop Rhizomes
Gear
All this seed starting info assumes you have what it takes to grow great seeds into great little seedlings. And, sad to say, in the Pacific Northwest that’s not just a South facing window.
- Read my opinionated take on which seed starting supplies are worth your hard-earned cash and which aren’t.
- I’ve been getting a ton of questions about grow lights lately! I upgraded last year to a T5 grow light (pictured below) and it’s been a dream. I’ll do a full post about my new grow light setup soon, but this is the grow light I have and it’s awesome.
Prepare and Prune
This is a great time to start thinking about warming your soil where you’ll be planting heat lovers like tomatoes and peppers.
If you aren’t opposed to using plastic in the garden, pin black plastic down over your beds for extra heat and weed suppression. Clear plastic actually warms soil even better, but allows weeds to germinate like crazy. If you plan to leave plastic on your beds the whole season and just plant through it, make sure you have a soaker hose or something to irrigate under the plastic.
You can also erect your low tunnels and cloches at this time of year, to help winter-water-logged soil dry out and warm. By the time your transplants are ready, the soil will be too.
There’s still time to handle dormant season pruning and spray fruit trees with dormant oil to control mites, scale and overwintering buggies. See the January To Do list for a recipe for my DIY All Natural Dormant Oil Spray For Fruit Trees.
Start Indoors
Whoa boy, here we go.
Perennials
- Asparagus: if you want to try growing asparagus from seed, you have to start now – the seeds can take almost a month to germinate. Personally, I’d buy 1 year old crowns from a good nursery or mail order seed company.
- Artichokes: I grow Green Globe and Violetta.
- Strawberries: I wouldn’t bother starting common garden strawberries from seed, but some of the rare alpine types might be worth a go from seed.

Brassicas
- Broccoli: early varieties should be started under lights this month for planting out under a cloche at the beginning of April. All around, I really like Belstar. It’s just a solid broccoli all year round. Some seed companies do broccoli blends, which are useful to home gardeners who don’t want to worry about succession planting. Territorial offers a good one.
- Brussels Sprouts: early varieties should be started under lights mid-month for planting out under a cloche at the beginning of April. I prefer Brussels Sprouts as a cool season crop, and will start them in June to mature in mid-September for harvest through fall and winter.
- Cabbage: Be very careful about variety selection here. You want an early cabbage with a maturity date of around 60-80 days. The really long maturing cabbages are better suited for fall. Farao was the standout variety in my garden last year. Hands down the best spring cabbage I’ve ever eaten. Start under lights mid-month for planting out under a cloche end of March/ beginning of April.
- Cauliflower: A bit more finicky than other brassicas, give special attention to your cauli seedlings with consistent moisture and lighting and regular organic feeding or slow release fertilizer in the grow medium. Early varieties should be started under lights late this month for planting out under a cloche at the beginning of April. I like Snowball, and Romanesco did very well for me last year too.
- Kohlrabi: I’m growing Lech this year, which performed better for me last year than any spring kohlrabi I’ve yet tried. I still find this this crop easier to grow for fall (use a large hardy kohlrabi like kossak for that) but Homebrew Husband adores kohlrabi so I’m trying to grow more of it.
- Kale and Collards: If you want early cooking greens you can start them now. If your space under lights is limited, wait and sow them out directly under a cloche next month. Both these crops germinate and grow well, even in cool soils. I’ll grow collards in the fall (champion is a fine vates-type) but I’ve already got my lacinato kale going from saved seeds.

Nightshades
- Tomatoes: If you don’t mind fussing with your tomatoes and if you have good strong grow lights and if you are planning on season extension, you can start your toms in February with plans to up-pot to gallons if necessary and transplant to a pre-warmed, tunnel-cloched bed in late April, depending on weather. If you just don’t want to put that much work into it, wait a month. I’ve had good results with Moskvich, Striped Roman, Amish Paste and most of the cherry-types. In a recent discussion on my Facebook page, many people weighed in with their favorite tomatoes and now I want to grow all the tomatoes.
- Hot and Sweet Peppers: I start these at the same time as tomatoes, knowing they will need more babying than ‘maters and will take longer to grow big. That extra grow-time on the bench is fine, since peppers can’t go out to the garden until June some years. I consistently have the best luck with King of the North bell peppers.
- Eggplant: How many eggplants are you really gonna grow? Give these another month or two before you start them because they are quite tender. Or just buy quality starts in early June.
- Potato: These you don’t really “start” but you can chit your seed potatoes to get a jump start on the season.

Leafy Greens and Herbs
- Chard: Start indoors now or wait a month and sow out directly. I grow rainbow chard.
- Salad Greens: Aim for a salad green sowing every month. New month? New sowing of lettuce, etc. That’ll give you edible salad greens in some stage of growth through October. It’s still quite early, so stick to the cool-weather cultivars like Winter Density.
- Spinach: Updated advice: I have now decided spinach is not a good crop to start indoors. You go right ahead if you want, but I recommend broadcast sowing this crop outdoors for better results.
- Herbs: now is the time to sow seed for parsley, lemon verbena, chives, fennel, borage, chamomile, chervil and johnny-jump-ups (yes, they’re edible!)
Other Stuff
- Onions and Summer Leeks: You started these guys last month, right? If not, you’ll want to jump on it now or we’ll be buying Walla Walla sets at the nursery together. You’ll want long-day or day-neutral onion varieties if you’re in the Northwest. No short-days.
- Peas: For the earliest possible harvest, start these inside in a length of gutter. Transplant them out to a cloched bed when they are a few inches tall and plan for early peas.
Sow & Plant Outside
Seeds
- Peas: George Washington’s birthday (2/21) is the traditional time to sow peas. If the soil has warmed up and isn’t waterlogged, and if you didn’t sow peas indoors, the end of February is a good time to get them in the ground.It’s been warm and dry-ish lately, so that might be just about perfect this year. If the soil still seems really cold and wet where you are, wait a few more weeks. Pretty much all peas grow well in the Northwest. I focus on Sugar Snap types.
- Favas: Direct sow anytime. When I grow favas, I grow the huge-seeded Broad Windsor.
- Garlic: You don’t have to do this because you got your garlic in last fall so it’s already showing 6 or 7 inches of shoot, right? Right? Oh, well, not to worry! Just stick some in now. Your garlic heads will be smaller but you’ll still have homegrown garlic.
- Salad Greens, Spinach, Asian Greens & European Greens: sow out the hardiest greens under cloche for the earliest possible direct seeded new crop greens. I rolled the dice and broadcast some arugula a few weeks ago and it’s up and growing already!
- Radishes: the little globe ones. Try a pretty mix like Valentine’s Day.
- Onion Sets: for early green onions, you can plant sets now and use them before they bulb.

Perennials
With these perennials, pretty much if you can buy it right now, and the ground can be worked without turning to mud, you can plant.
- Bare root fruit trees: these should be put into previously prepared ground while still dormant.
- Bare root fruit bushes: These are your currants, gooseberries, blueberries, etc. Just like the trees, get these in the ground while still dormant.
- Cane fruits: Blackberries, raspberries, etc. available bare root now.
- Rhubarb crowns: These can be had by dividing established plants, ordered online, or purchased at a good nursery.
- Horseradish roots: these can be invasive! It’s a good idea to plant them in a very large container sunk into the ground to control their roaming. Of course, I didn’t listen to myself, I just stuck them in the ground last spring and now the roots are as big as my wrist and I’m kinda screwed. Oh well.
- Asparagus crowns: Easier than seed, these look like shriveled up sad, brown baby octopi when you first pull them out of the bag. They’ll settle in, though, and in a few years they will be monster plants with roots 8 feet deep. Asparagus is cool like that.

Harvest
I’ve got nothing in my garden right now but mache and kale, but maybe you do? At this time of year in the past, I’ve harvested:
- Brussels Sprouts
- Overwintering Cabbage
- Carrots & Parsnips
- Kale and Collards
- Overwintering Cauliflower
- Sprouting Broccoli
- Winter Kohlrabi
- Chard
- Leeks
- Turnips & Rutabagas
- Protected Salad Greens, Asian Greens and Euro Greens
- Jerusalem Artichokes
- Stored Winter Squash
- Stored Potatoes
- Celeriac

What are you doing in your garden this month?
Reader Questions: Expanding The Garden, Best Gardening Tools, Sand In The Chicken Coop & More
I’ve been sitting on a pile of Reader Questions for awhile. I love your questions – they’re the best source of inspiration and really help shape what I write about!
It’s my experience that if one person has a question, 20,000 people have that question. And if I don’t have an answer – one of you will, because readers of this blog are very smart people (also witty, charming, and exceedingly good looking).
So I think it’s time to haul our Reader Question series out of mothballs and tackle a few, don’t you?
This round: expanding a garden in Spring, the best gardening tools, why we homestead, sand in the chicken coop and more.

Best Way To Expand My Garden In Spring?
We are expanding our in-ground garden (yes I should have started in the Fall but with early pregnancy sickness I was too damn lazy). How do I expand the garden this late in the year? Right now it is sod. We have a rototiller and we also own a tractor but everything I have been reading is telling me to not disrupt the soil with those means.
The more I read, the more confused I am. I know you utilize raised beds but was wondering if you had any recommendations. Thank you for reading this drawn out email and thank you for the time you put into your blog.
Steph
Start here. Then, if you have time, watch this.
I’d start by covering your sod where you want to garden with plain brown cardboard. Then I’d make deep-bed lasagna garden type mounds atop the cardboard with every bit of organic matter you can find – old straw, rotten manure, compost, chicken bedding, kitchen scraps, the worm bin contents – whatever you’ve got. Try to get 12-16 inches deep. Then top with a 4-6 inch layer of wood chips. Don’t mix wood chips in – keep them on top. Do this all right atop the cardboard-covered sod.
Then I’d cover the bed mounds with black plastic to help retain heat in winter and encourage microbial life to form as much as possible. You’re basically doing a giant compost-in-place bed at this point.
You can layer in mineral amendments right along with your organic matter no problem. In fact it’s a good idea to add some slow release nitrogen, like seed meal, to the mix as you go, just to counteract the nitrogen tie-up from the decomposition process. If your chicken bedding is sufficiently poop-covered don’t worry about this.
In spring, plant stuff that’s transplant-y, like tomatoes and squash, into the bed and make a kind of “hole” of potting soil within your mounds that you transplant into. This gives the plants a more “finished” soil around their baby roots, then as they grow they will go out into the mound to find what they need.
By next spring the whole thing should be so nicely broken down that you can direct seed without issue.
Advice on Homesteading in Bend, Oregon?
We are moving from Southern California, where we have a 10′ by 10′ backyard garden, to Bend, Oregon and 20 acres. I get to be the gardener in charge of growing as much food as possible for our 2 families. I am super excited but feeling overwhelmed. Any direction you could give this Northwest newbie would be much appreciated!
Jen
I’ve been to Bend a few times. It has a very unique, and a little challenging, climate. You’re basically high desert up there – so expect extreme temperature swings day to night, late frosts, and not too much rainfall.
If the goal is maximum food production, I’d look at setting up a hoop house as early as you can. The added season extension and moderating influence of crop protection for that climate will make a huge difference in your ability to consistently get two crops per year per chunk of land.
Grazing is good in Bend as I recall – goats might be an ideal livestock for you. Be very sensitive about water use and water catchment. The cheapest place to store water is in the ground. If you aren’t familiar with permaculture, please investigate swales on contour for an idea of how effective passive water harvesting can be if you just dig your ditches right.
Geoff Lawton has a series of free videos that might be useful. They are behind a subscription firewall, but they are free and totally worth it. On 20 acres, with thoughtful design, you can build yourself a paradise.
Any gardeners from Bend able to weigh in on this?
What Are The Best Gardening Tools?
Do you have any advice on selecting the best gardening tools?
Chris
I sure do!
First – you need fewer things than you think. Second – some of my favorite gardening tools aren’t super expensive. So while you do generally get what you pay for, there are some really clever tools out there that don’t cost an arm and a leg.
I recommend skipping the “garden sets” that you see at big box stores – you know, they usually have a trowel, a hand fork, some useless cotton gloves, and a bucket. Those things are terrible.

Here are my top 5 essentials:
1. Gloves
For almost everything, you want a soft, flexible glove with nitrile dipped fingers to keep your hands dry and give you great grip. I buy mine 6 pairs at a time, so I (usually) manage to have a complete set clean and dry. Gloves like this are great.
2. Japanese Hand Tools
I far prefer Japanese style hand tools for gardening. I use a Japanese handheld hoe, a Japanese sickle, a claw cultivator and a handheld pick-mattock pretty much every time I’m out in the garden.
3. Pruners
The last name in hand pruners is Felco, and they make some exceedly great tools. But, I discovered last Spring that Costco has released a Kirkland signature brand of hand pruners that are perfect Felco knock-offs. So if you’re a Costco member and you want to save some coin, check out the house brand clippers.
With the money you save, you can buy a Felco folding hand saw – essential for pruning anything too large to tackle with your pruners.
4. A Good Hoe
Slop giggling. We all need a really great hoe.
I strongly prefer the style of hoe called stirrup, scuffle or hula. This type of hoe looks like a metal stirrup, like you’d find dangling from a horse’s saddle. It cuts weed roots on both the forward and back stroke, and I feel strongly that a hoe should do excellent work on both the push and the pull.
I’m not too picky about brand. This one gets good reviews.
5. Metal, Flexible Rake
I love rakes! I have 6, I think. But my absolute, all purpose favorite is my spring metal rake. This is a rake with about 9,000 tines*, all made of thin, flexible metal. Again I’m not a snob about brand – I just want something sturdy, with tines that keep their shape and a handle that will last despite my inevitable neglect. The rake I love is very similar to this one.
*Slight exaggeration
How Is The Sand In The Chicken Coop?
Do you still use sand in your coop? Also, what do you recommend to use as a floor in any outside runs? I don’t have grass in the area I want to make an additional run and wondered what would be best to put down.
Ellie
I do still use sand, and I really like it! The coop floor and inner run are both sand, and we’ve been very happy with how it’s performed. Our yard has a high water table and the improved drainage from the sand has helped keep the coop clean(ish) and dry.
In the outside run, I typically use arborists wood chips because they are free, high carbon, and great at absorbing chicken poo. When the chicken manure and wood chips are composted together, they make a really lovely soil amendment. I don’t recommend straw outside in the Pacific Northwest – if it stays wet it tends to mat down and get quite moldy and full of icky spores.
Help! Great Looking Greenhouse?
I need a plan to build a greenhouse that looks great architecturally and is large enough to possibly accommodate some in-ground tomatoes, to extend their growing season.
I know that this may be out of the realm of this forum, but that is what I need. :-)
Bob
It’s true – once you go greenhouse, you never go back. The greenhouse I have – a small Juliana model – is pretty functional looking. For a really architecturally handsome option, I’d guess you’re hoping for something like this:

Unfortunately, of course, greenhouses like this come with a price tag to match their splash.
LSU’s Ag Department has a pretty comprehensive selection of greenhouse plans. I’d start there and see if anything strikes your fancy, then modify plans as needed to give you the look you’re after.
Do you know of any really great sites for greenhouse plans?
Why Do You Homestead?
Why do you homestead? I mean, I think there are lots of answers to the question and a main one would be to know where our food comes from but why is that important to so many people all of a sudden? I’m pretty fascinated by the ‘why’ of people’s actions.
Melina
Yes, it’s saving money and food confidence and the political statement and the lovely challenge of it all. But more than that, it’s simply that I love the life.
I can’t answer this question for anyone but me, of course, and homesteaders come in all shapes, sizes, and acreage levels. But I feel like I’m more who I really am when I live this way. I feel like my practical life is more aligned with the values that shape my aspirational life. And the feeling of closing that gap makes me happy.
I suppose I could embrace the good fortune that allows me to be a stay at home mom and spend my hours shopping at Target and getting my toes painted (I do live in suburbia, after all), but that kind of thing makes me want to punch myself in the throat. So I do what I do because it feels like a more honest expression of me. And that makes me happy.
Want more? I tackled this issue in a bit more depth here back in 2012.
This answer will be different for everyone – so tell me, why do you homestead?
Want to ask me a question?
It’s easy, and I’d love to feature your question on next month’s Q&A! Just follow these steps to make it easier for me to answer your question:
- Send me an email with “Question for Erica” in the subject line.
- Ask your question in one or two sentences.
- Start a new paragraph and provide any additional details that are relevant to your question.
Thank you!
Reader Questions: February
I can’t let February sneak past without doing a reader question post. This month: fermentation lids, peppers that will ripen in the Northwest, litter for chicken coops and more.
We also have Community Questions asking for suggestions, advice or resources for gardening in Central America and Florida. I’m not knowledgeable enough to answer, but maybe you can help?

Do I Need To Use A Crock Cover For Fermentation?
What is the purpose of the crock covers I see marketed and what benefit would they offer me?
I’ve been making 5 gallon batches of kraut and pickles for a few months now. I typically leave the crock in the basement while it ferments and every day or three I skim off the scum (yeast as I understand it). I cover my crocks with a towel as they are going to keep out any dust/young children.
Clinton
So just for folks who aren’t sure what Clinton’s talking about, we don’t mean the inner weight you’d use to keep your fermenting vegetables submerged. We’re talking here about an outer cover designed to keep dust and contaminants out of your ferment.
The classic, straight-sided stonewear crocks without a water moat like these are often sold without a cover. But if you want a lid, you can buy one as an accessory. Here’s a picture:

These lids for straight-sided crocks are totally optional. They aren’t going to make the difference between a failed and a successful ferment. That said, they do offer some advantages.
- While not air tight, the covers will slow down oxygen exchange to your ferment as compared to a towel.
- They are going to be more effective at keeping dust, airborne yeast, and similar contaminants off your ferment than a kitchen towel, simply because they aren’t porous like cloth, so you will need to remove scum from your ferments less often.
- They are opaque, so light will not damage your ferment.
- They are heavy, so they are unlikely to be blown, snagged, or accidentally knocked off your crock.
- They promote temperature stability in your ferment by adding additional mass around your ferment.
So these covers are useful, but the truth is, any solid, earthenware plate with a lead-free, food-safe glaze of an appropriate size would provide similar advantages. Traditionally, lots of folks made wooden lids to cover their crock.
You mentioned young kids. If you are keeping your crocks someplace where kids might get into them, it’s worth considering if a heavy and breakable lid is maybe not a better option than your towel – I’m just thinking of my son sliding something like a ceramic crock cover off and then dropping it right on his feet. Cause he would do something like that.
If kid safety isn’t an issue, you can use a heavy plate to test-run the utility of a heavy, opaque lid. If you find that cover cuts down on contamination and the amount of skimming in your particular situation, you might decide investing in the dedicated crock lid is worth it.
Sand Over Concrete Floors In A Chicken Coop?
I have a question regarding the floor of my coop. We live on an old dairy farm and are converting the old “milking room” into a coop. It has concrete floors. I had planned on covering the floor with straw until i read your blog on using sand. Any thoughts or ideas? I’m hoping concrete won’t be a problem.
Thanks
Denise
I’ve been really happy with how clean sand had been in our coop, but I can’t imagine that sand would be a cleanliness advantage over straight concrete.
A search for “coop floor sand over concrete” brought me to this tale of coop sadness, from a woman who said her sand-over-concrete coop floor was a stinky mess any time it got wet. Her report enhanced my skepticism about sand over concrete.
Brilliant readers, anyone want to weigh in on this?

In terms of non-sand options, I don’t know if you are thinking a deep-litter, compost-in-place type system, or just a layer of straw to give your hens a more comfortable grip as they walk. There are many advantages to a deep litter system, but to do it successfully the litter needs access to micro-organisms.
I’ve only ever done deep-litter over dirt, but I’m sure with a bit of patience and perhaps an inoculation of your litter with some good garden soil you could make it work over concrete. If just might require a bit more fiddling than it would over soil. This is a good article on deep litter coop maintenance if you want to go that route.
In your situation, I’d honestly be excited to have a concrete floor ready to go in my coop. I think you’re gonna be really happy with it. I’d do some research to see if you want to seal the concrete in some way before it gets used as a coop, then for your birds I’d go with your original plan and lay down at least 4-6 inches of bedding over the concrete.
Straw is a fine litter as long as it stays dry. Wet straw is not nice. If you are rural, straw is very cost effective. Non-aromatic wood shavings or clean chips work well in my experience. I’ve also heard really good things about wood bedding pellets (like this) in coops. If you happen to live in an area where rice is grown, rice hulls are supposed to be great. (Hat tip to Root Simple for that tip.)
What Peppers Will Ripen In The Northwest?
I live in southwest British Columbia, close to the Pacific ocean, so we are blessed with a so-called Mediterranean climate, but we have summer fog all summer long, even when it is not visible. Two of my favorite vegetables, tomatoes and bell peppers, cannot be ripened outside, which is okay because I have a passive solar greenhouse.
But, bell peppers are still problematic (My tomatoes are beyond excellent, I have been told). I have not found a variety of pepper that matures and turns red early enough to harvest a reasonable quantity to get us through the winter – any suggestions?
Mike
King of the North is my favorite red bell pepper for short season summers like ours. If you are ok with a sweet red pepper that’s not a bell-shape, try the Italian horn shaped peppers. Carmen is a great variety – reliable, sweet and thick-walled for a frying pepper. Gypsy used to be a favorite but I think it’s pretty much gone from seed catalogs now.
Just like cherry tomatoes ripen before beefsteaks, mini bells will ripen earlier than the full size peppers. The sweet baby bell peppers are probably worth experimenting with for your situation.

Convert A Crawl Space To A Root Cellar?
I live on very small piece of land in a 950 ft home. I’ve started to put up my veggies and have always made jams/jelly, Aigre-doux, etc. but that leads to my problem which is storing these goodies.
I have no basement or garage where I can keep things cool or have a second refrigerator. My house sits on a two foot crawl space though and I have been considering digging out some of that crawl space to create a makeshift root cellar.
Any creative ideas on how to go about this?
Karen
The amount you manage to grow in a small space is awesome. Well the first thing I want to clarify is that you don’t need a root cellar to store canned items like jams, pickles, etc. – jarred foods should keep fine at room temperature, though cool, dark storage helps preserve flavor and color longer.
If you are primarily looking for storage for your jars, any nook you can find or create in your home will do fine. I know space is at a premium but I feel like there must be easier ways to build-in additional storage as opposed to digging out a crawl space.

Where the cool, even temps of an underground root cellar really help are with fresh storage crops like beets, carrots, onions, winter squash, etc. and living ferments like sauerkraut. So if you are growing a lot of storage crops, I think a test-run of the crawl space root cellar concept is a really neat idea.
What if you got a plastic laundry basket – something with some ventilation holes – that would fit in your crawl space as it is now? I’m thinking you might put a selection of items you’d want to store in the root cellar – squash, beets, etc. – as well as a few jarred items – in the laundry basket. Then store this away in the current crawl space and try to get a feeling for how this space already works.
In terms of the actual conversion of your crawl space, I found some info on converting crawl spaces into basements, and while I think you’re talking about a much smaller scale excavation, this does not seem like a DIY kind of project. The trick is removing some of the dirt under the house without removing any of the dirt that’s important for keeping the house up. I’m getting a real, “a structural engineer should sign off on this,” vibe. Sorry. :(
Community Questions! Can You Help?
I have two reader requests for information of a regional nature. Unfortunately, neither region is one I’ve much knowledge of.
We live in a tropical island environment in Central America. I have searched for good tropical gardening reference books, bought a couple, but pretty much useless on much of the information. Anything you can recommend would be appreciated.
Cindy
and
If you have any info for Florida heirloom species, tips, insights, or thoughts, I would appreciate them.
Marshall
For both Cindy and Marshall, I’d point them in the direction of Geoff Lawton’s permaculture work. His does a lot of tropical and sub-tropical design. I’d definitely spend some time with Geoff’s stuff if you have questions about design or layout of your garden.
Kris from Attainable Sustainable (a great site if you don’t already follow it) homesteads in Hawaii – she might be in a similar enough climate to be helpful to you both.
I know Southern Exposure Seed Exchange has an amazing reputation for quality seeds that are well adapted to a Southern climate. I’d definitely point Marshall in that direction, and even Cindy might find SESE’s grow guides useful.
Other than that, I’m not familiar with many tropical/sub-tropical gardening resources.
Readers – Do you know of any great books or websites that might help Cindy with her tropical, Central American garden or Marshall with his Florida garden? Please share in the comments.
Want to ask me a question?
It’s easy, and I’d love to feature your question in a future Q&A! Just follow these steps to make it easier for me to answer your question:
- Send me an email with “Question for Erica” in the subject line.
- Ask your question in one or two sentences.
- Start a new paragraph and provide any additional details that are relevant to your question.
PS – I have this nagging feeling that someone sent me a question and I responded, “I’ll answer it in the Feb Q&A” and I haven’t. If that’s you, I’m sorry! I can’t find the original email – can you please re-send your question?
Thank you!
Five Things Friday: 6/2/17
I have been in such a great mood this past week. I don’t know if it’s that we had those stretch of bright sunny days and I finally feel like my garden is somewhat back under control, or that school is nearly over, or what, but it’s been a great week!
This week’s randomness: how to justify chocolate chips for breakfast, a new favorite watering tool for the garden, the most adorable house-swap you’ll ever see, my everyday beverage carry, and why no one goes out for lunch anymore.
What I’m Eating: Chocolate Chip Yogurt

Ok, this is what you do. Take out a pint jar of homemade unsweetened yogurt. Scoop half of it into a bowl. Toss some chocolate chips in there. If you have mini chocolate chips that’s even better.
The yogurt is tart, but then you get these little bursts of chocolate-sweetness when you hit a chip. Perfection.
The next day: take out the now half-full pint jar of yogurt and toss your chocolate chips right in the jar. No need to make a bowl dirty.
Now you’ve got an excuse to eat chocolate chips in the morning for the probiotic. You’re welcome.
2. Gardening Tool I’m Loving

I helped my neighbor water her garden the other day (that’s her fresh and tidy garden in the photo, not mine), and got to try out her sweet watering wand. It was love at first sproodle! (I think I made that word up, and now it sounds dirty.)
It’s a Dramm 30-inch Rain Wand, and it was just a dream to use – smooth on/off action, fine, dispersed water pattern, and great reach. I liked it so much I ordered one for myself, for spot watering and keeping stuff in pots alive over the summer. It should be here soon! I’m very excited.
What I’m Watching: Amazing Hermit Crabs
No words will do this 5-minute long nature video justice. Just trust me – it has David Attenborough and hermit crabs playing Extreme Flip This House. Watch and be amazed.
What I’m Packing: Everyday Beverage Carry

This is how I roll when it’s gonna be a long, thirsty day out of the house. All this fits easily in my backpack (it’s a big backpack) with plenty of room left over for my laptop, various power cords, kids school books, pencils, wet wipes, and assorted other essential and educational things.
Left to right in the back:
Quart-sized mason jar topped with a reCAP flip lid. That’s my water bottle. Goes everywhere with me.
Bonavita mini electric kettle. I looked everywhere for an electric kettle that was small enough to be genuinely portable. I tried an immersion water boiler first, but didn’t like it at all. It seemed like a child-scalding just waiting to happen. But I love this little kettle. You can see from the picture it’s about the size of a quart jar.
Stanley thermal coffee mug. I got this last year for camping with an REI dividend and immediately made it my everyday to-go coffee mug. Excellent quality (I’ve dropped it multiple times and it’s still perfectly leak proof), easy to drink from one-handed, and it keeps my coffee warm for several hours.
And in front, assorted tea and instant coffee. I love Throat Coat and just about everything from Traditional Medicinals. Instant coffee is bullshit, but I pack Starbucks Via which is slightly less bullshit than most, better than stale percolator coffee, and comes in very convenient single-serving tubes.
When it’s time for a tea or a coffee and I’m at the kid’s school, or off somewhere on an outing, I hit up the water fountain to fill my thermal mug with water. Then I pour the water into my mini kettle, plug-in the kettle, wait about 3 minutes, and pour the steaming hot water from the kettle back into the thermal mug. I do it this way so I never heat up more water than my mug will hold.
Then, I just drop in a tea bag or a packet of the instant coffee, depending on my mood, seal up my thermal mug, and I’ve got a nice hot beverage for the next couple hours, when I’ll probably repeat the whole process. Cheaper, quicker and easier than finding a café.
What I’m Pondering: The High Cost Of Restaurant Food

I read an article in the Wall Street Journal the other day (it’s behind a pay wall, but if you are a subscriber or have google-fu you should be able to read it) called Going Out for Lunch Is a Dying Tradition.
Here’s the take-away. (Hah! Get it? Take-away. Lunch pun.)
In even high-powered, corporate settings, people are rejecting lunch out in favor of brown bagging it or getting food delivered into the office. A couple things are at work.
- Check the chart above. The cost of dining out has risen dramatically in the last several years, while the cost of ingredients from the store has been stagnant or even dropped, depending on what’s in your shopping cart. The financial spread between dining out and brown bagging lunch is very noticeable right now.
- Culturally, we have all decided we are far too busy to sit down for a midday meal. This is true even for highly paid “power lunch” types who aren’t as price sensitive as the average worker. The article mentions “lunch and learn” sessions – because there’s no time to just lunch, you know.
- A lot more people are telecommuting. Homebrew Husband is one of these corporate, knowledge-worker types. He works from home about 80% of the time. No need to go out for lunch when your full home kitchen is right down the hall.
Have you changed your dining out habits for lunch – or any other meal – because of the increasing cost of restaurant food?
• • •
Ok, friends, that’s it for this week’s Five Things Friday. Hope your weekend is fab!

Build A Super Simple Tool Rack From A Pallet
It started when my son, the would-be builder, saw a couple of pallets at our neighbor’s house. They were propped up on the side of the road with a “free” sign stuck on. Have you ever seen a 6-year-old drag a full-size pallet for half-a-block? Adorable.
Our neighbor got wind of my son’s scrap-wood obsession and donated even more pallets to the cause. (He even brought them to our house – I have the best neighbors!) Soon, our driveway was practically paved with pallets.

My son had plenty of opportunity to create with his pallets, but about the time I wrote this, I decided enough was enough and confiscated a few for my own use in the garden.
What I had in mind was a simple tool storage system. About five years ago, I used a pallet to screen one of those ugly, dumping ground storages zones on our property from view of the street. That pallet has held up remarkably well, and over time I started to just stick garden tools in it, where they sit happily, until I finally go weed the front garden.
I figured something similar out back would be a good space-saving way to store garden tools during active gardening season.
I started by hauling the two most attractive, solid-looking pallets around back, to the path area between my chicken run and the main garden (this photo collage should help get you oriented if you want).

Because of the cross bracing in pallets, there are natural built-in dividers that nicely hold long-handled garden tools. I debating ripping down some 2×4 scrap to make more of these cross braces. If I had more skill with power tools, or owned a table saw, I probably would have. But as-built works fine.

To level the pallets and to get them up off the ground where they would rot far more quickly, I set the pallets on a few cinderblocks. The pallets and cinderblocks were leveled very well. I took quite a while with this, doing it right, but since the fence behind the pallets isn’t level, there’s a bit of a wonky look when you step back. Oh well.

I wanted to secure the pallets in a way that would not permanently affix them to the fence. The fence badly needs to be stained, and that’s on my list for this summer. So I wanted to be able to fairly easily remove the pallets and set them aside when paintin’ time rolls around.
Solution? Hammer in some metal U-Posts! (Like these.) Each pallet got one U-Post, and they were positioned so they pushed the pallets back against the fence as much as possible for added stability.

It took a bit but I got the U-Posts level with the pallets eventually. The pallets were tightly wired to both the U-Posts and the fence behind.

The next part was kinda a pain. I found whole and broken cinder blocks and big rocks, and filled in the gaps at the base, in-between the “real” cinderblocks that hold up the pallets

Then I poured a bunch of 1-2″ drainage rock we had leftover from another project down the middle of the pallet, to fill to about half-way up the first “course” of wood. This improves drainage, so the tools won’t end up in a standing puddle if when we get late-spring rains. It also raises up the tools in the pallet so they sit a bit higher.
A bunch of rocks slumped down into the chicken-coop because there were some gaps in my foundation. That was a serious drag. Although I like the outcome of the drainage rock layer, it was tedious to do.

A nice bright coat of paint and my pallet tool storage rack is done! I really like this simple tool storage solution!

Thoughts, Ideas and Suggestions
If you have better woodworking skills than I do, additional divider sections would help more tools stay more perfectly upright.
Some hooks on the front for hand tools would work well.
Someone on social media asked (I think with mild horror) if I leave my tools outside. Yes, yes I do. I’m pretty good about getting the hand-tools I really rely on under shelter, but I leave my long-handled tools lying everywhere during active gardening season. It’s not deliberate neglect, it’s just that I sometimes hop from one thing to another faster than I should. If you take better care of your gardening tools then I do, this might not be a great solution for you.
However, my tool care failures are why I like this set-up, actually. It’s so space efficient that it tucked right in next to my main gardening area, which helps me keep my tools put away and contained, even if they are exposed to the elements.
I think you could do something like this inside a carport or storage shed for year-round tool storage, assuming the roof on your covered area was tall enough to let you lift the tools up and out. Although for tool storage inside, it’s hard to beat nails-in-studs.
Pin Me, Share Me, Save Me For Later


